Custom Event Goals
Follow these two steps to track custom events.
Step 1. Add class name on your page
First, you need to tag the html element you want to track with a CSS class name in this format:
maxconv-event-name--{MY EVENT NAME}
The double dash(--) stands for equal, {MY EVENT NAME} is the event name you want to track.
For instance, if you want to track checkout button click on your pre-sale page, you can use: maxconv-event-name--InitCheckout
<!-- before -->
<a href="https://someproduct.com/checkout" target="_blank">Checkout</a>

<!-- after -->
<a href="https://someproduct.com/checkout" target="_blank" class="maxconv-event-name--InitCheckout">Checkout</a>
If your element already has a class name, just separate the new ones with a space:
<!-- before -->
<a href="https://someproduct.com/checkout" target="_blank" class="some-existing-class">Checkout</a>

<!-- after -->
<a href="https://someproduct.com/checkout" target="_blank" class="some-existing-class maxconv-event-name--InitCheckout">Checkout</a>
If your site builder does not support adding css classes, you can use a small js snippet to do so, check below document:
Verify that the class names were added correctly
After adding the class, please go back to your page, and verify that the class attribute got added with the exact required format.
You can check it by right-clicking the element and inspecting it. This will show you the HTML code of the element.
When adding custom event to a form, please make sure you add the class name to the <form> tag, otherwise, it won't work
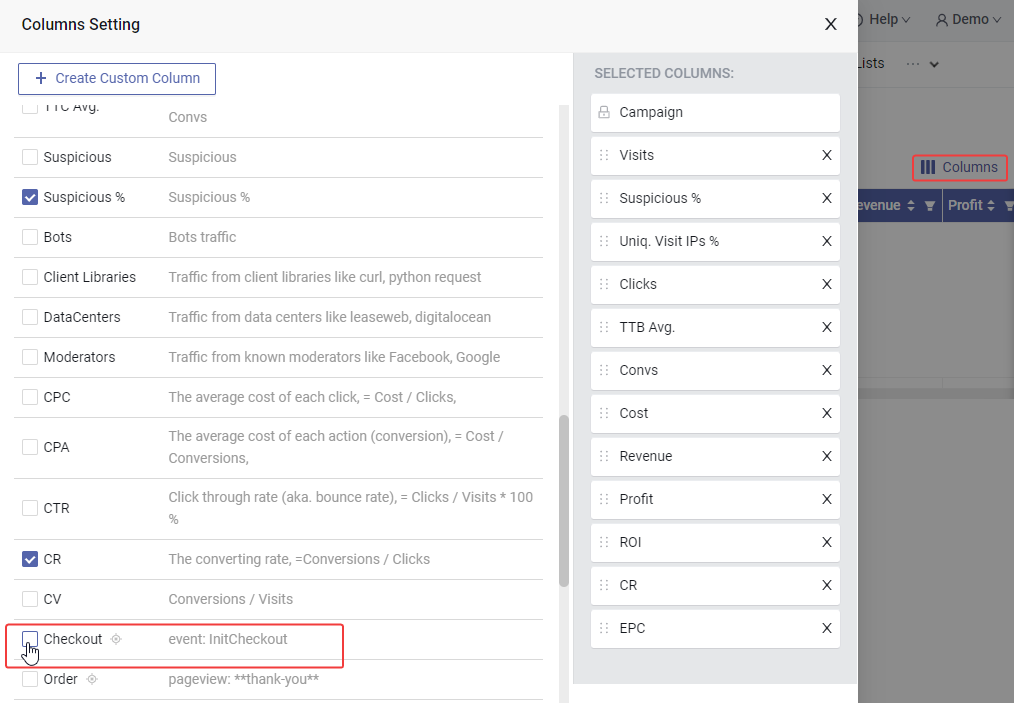
Step 2. Create a custom event goal
You send custom events to MaxConv in step 1 (as "InitCheckout" event), but they won't show up in your report automatically. Let's configure the goal for the event numbers to show up.
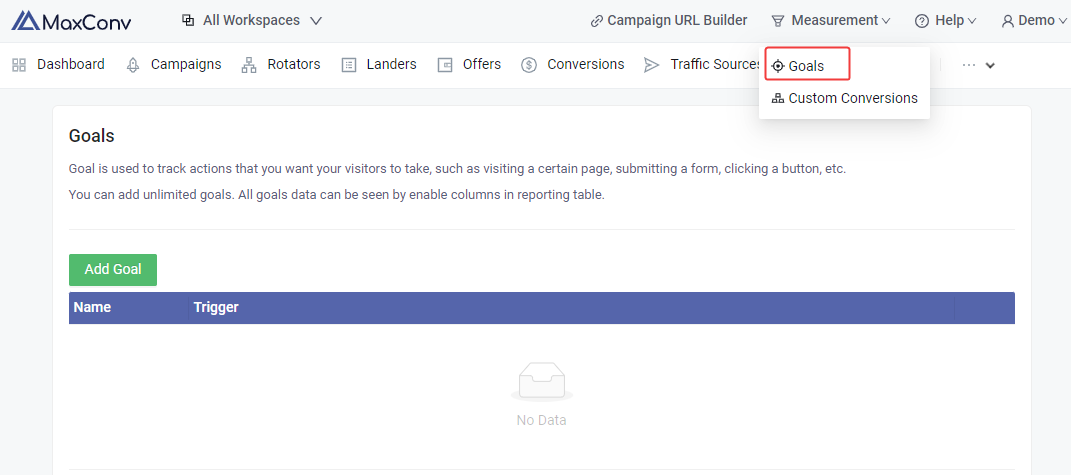
Go to Measurement >> Goals in top right of MaxConv.
Click Add Goal button, select Event as the goal trigger and enter name of the custom event you are sending. The name must match the one you added as a CSS class name on your page. So in our example we add a CSS class name maxconv-event-name--InitCheckout, the goal to add is InitCheckout.

Next, click on the "Save" button and you'll be taken back to the goals page.
Then enable the goal column in report columns, you should see the number of visitors who reached the specified page or group of pages.