ClickBank Integration (S2S Postback)
ClickBank's new S2S Postback/Pixels feature enables clients to send events like order form impression to MaxConv, through a modern server-to-server (S2S) integration method, providing the most reliable and accurate data.
The benefits of new S2S Postback/Pixels over old INS & ISR (Integrated Sales Reporting & Instant Notification Service):
Easy to implement, the new S2S integration is much easier to set up.
Reliable data transition, since the request of new integration happens between Clickbank servers and MaxConv servers, it's more reliable than the old client-side (browser) way that INS & ISR uses.
Realtime Data, events are delivered to reporting as soon as possible, allowing clients to make data-driven decisions as they arise.
Create New Integration
Part I. Create Integration
The first step is to create an integration in ClickBank. Follow the steps below:
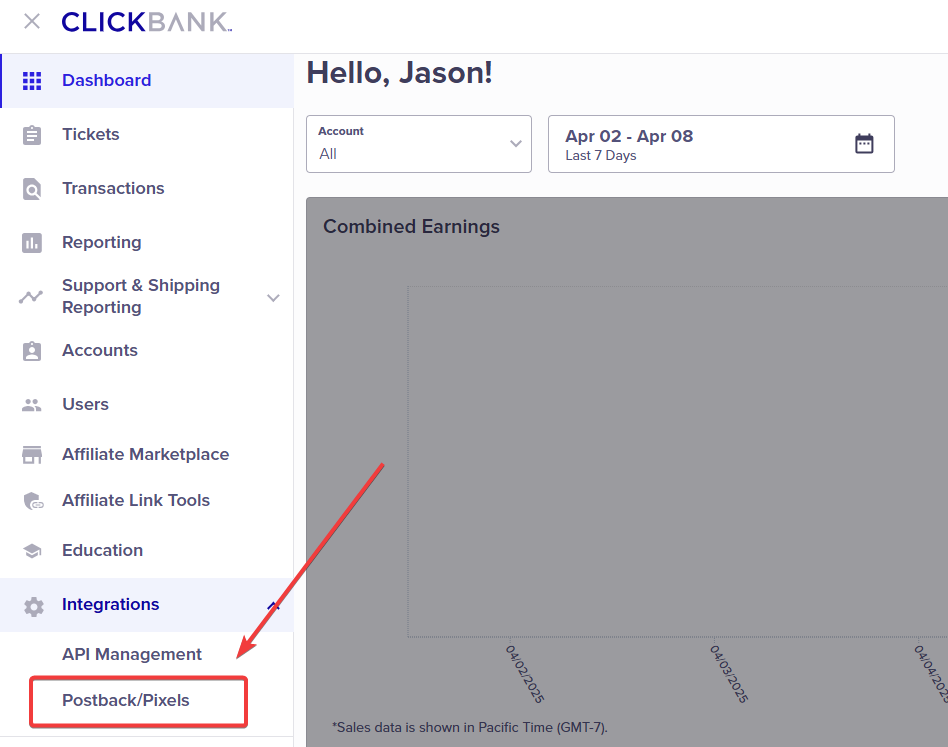
Select Integrations from the vertical navigation menu on the left side of the screen. Then, select Postback/Pixels.
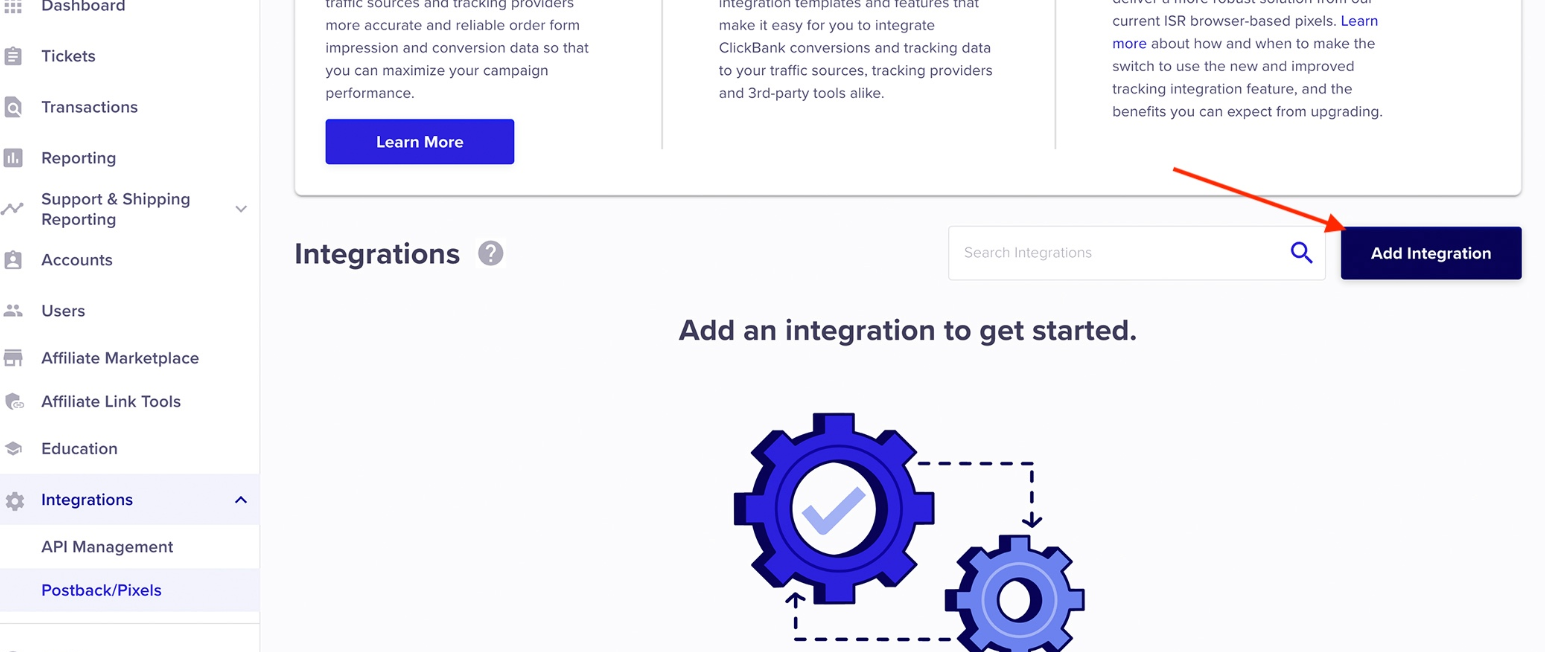
- Click Add Integration button.
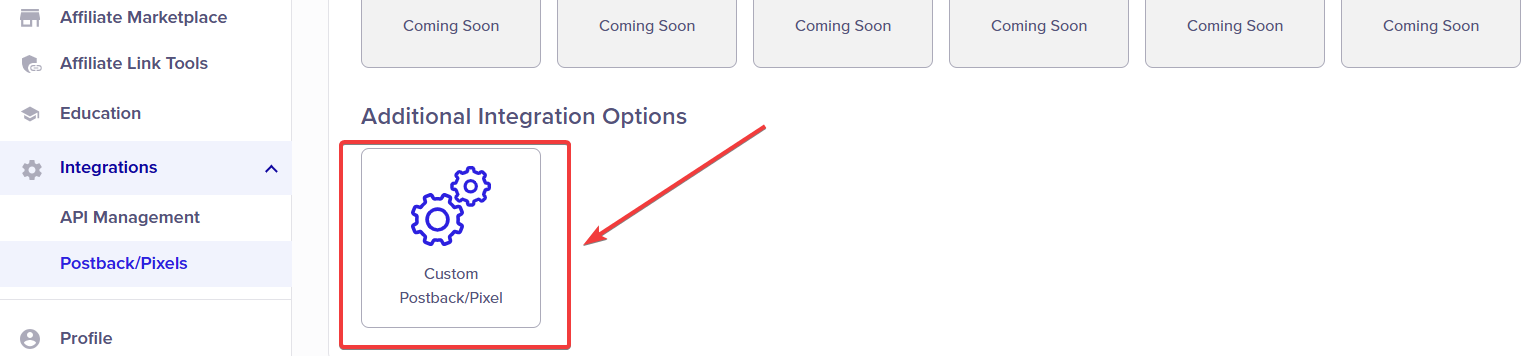
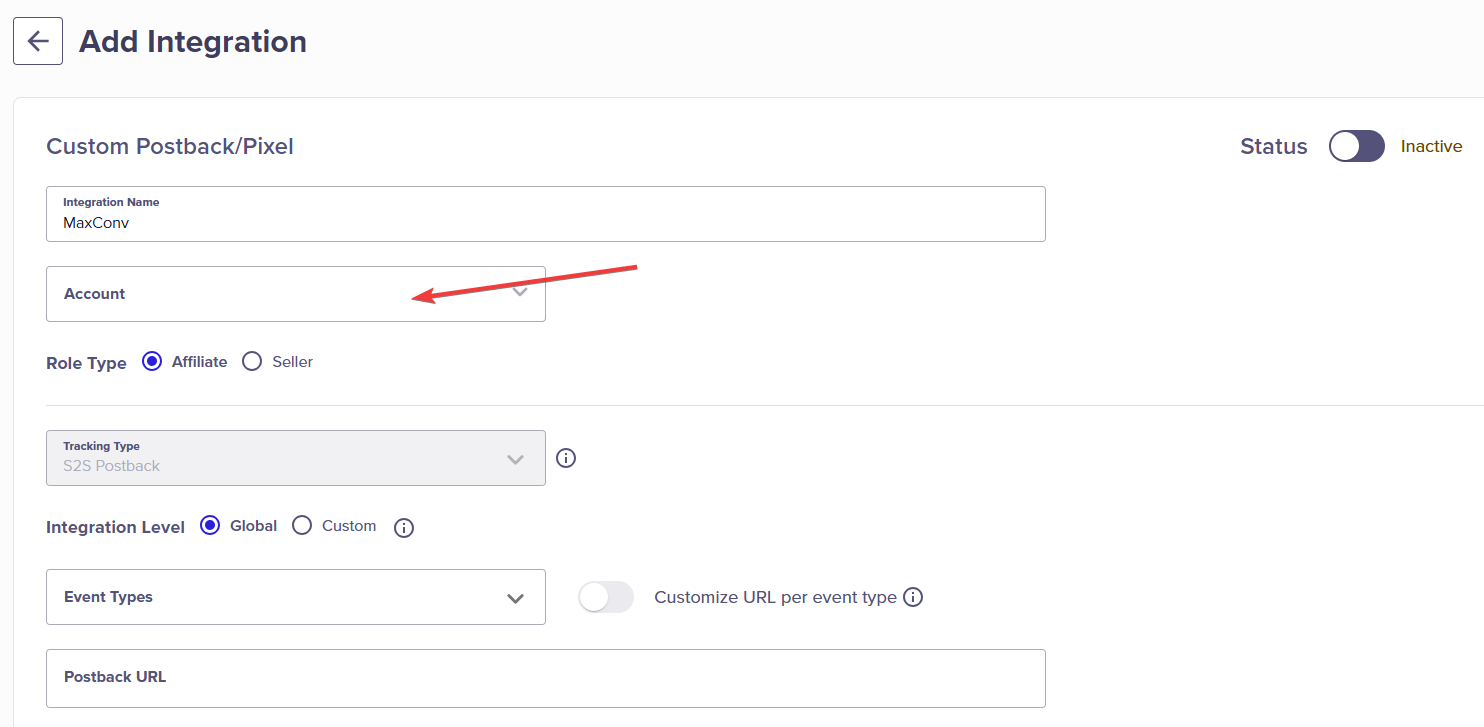
- Select Custom Postback/Pixel.
- Provide a name for the integration so you can easily identify it. This name is not exposed anywhere and is only for your purposes.
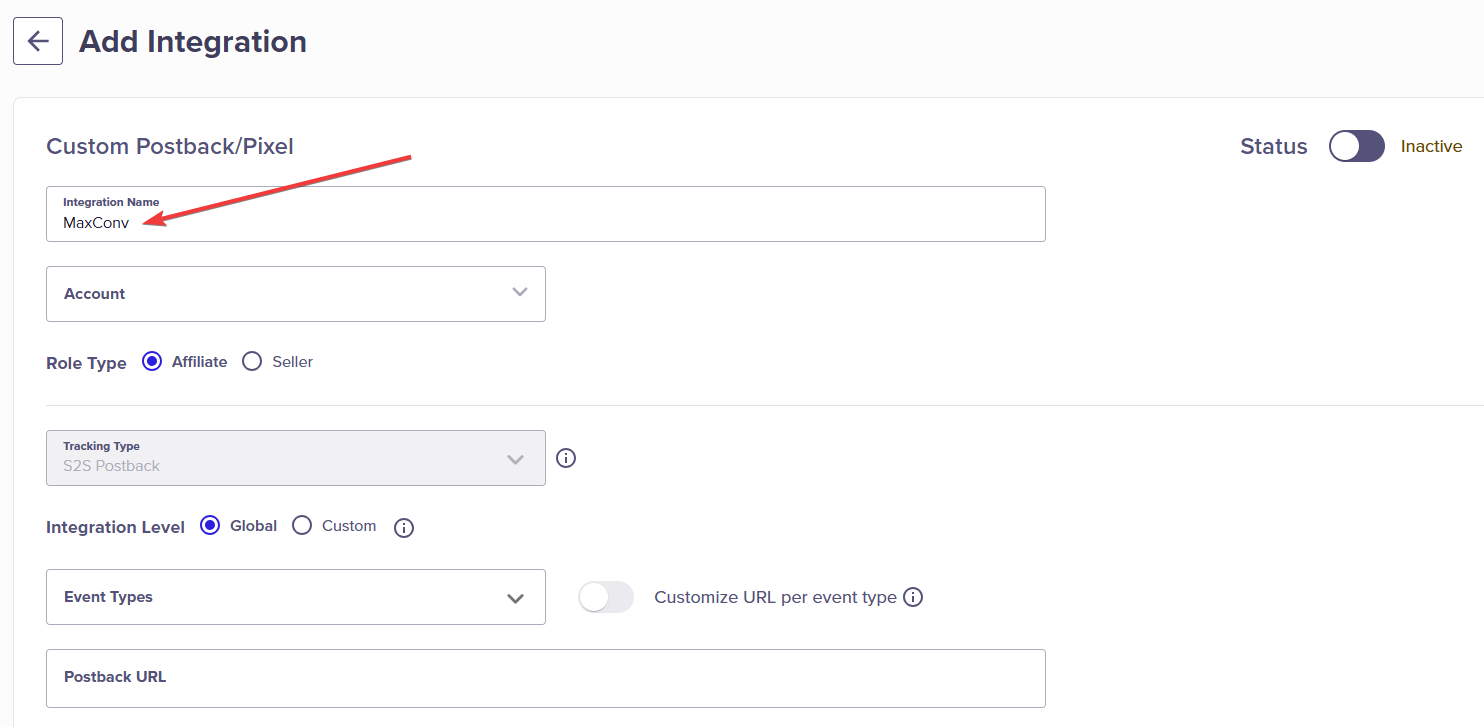
- Select which account nickname you wish to integrate from the Account dropdown.
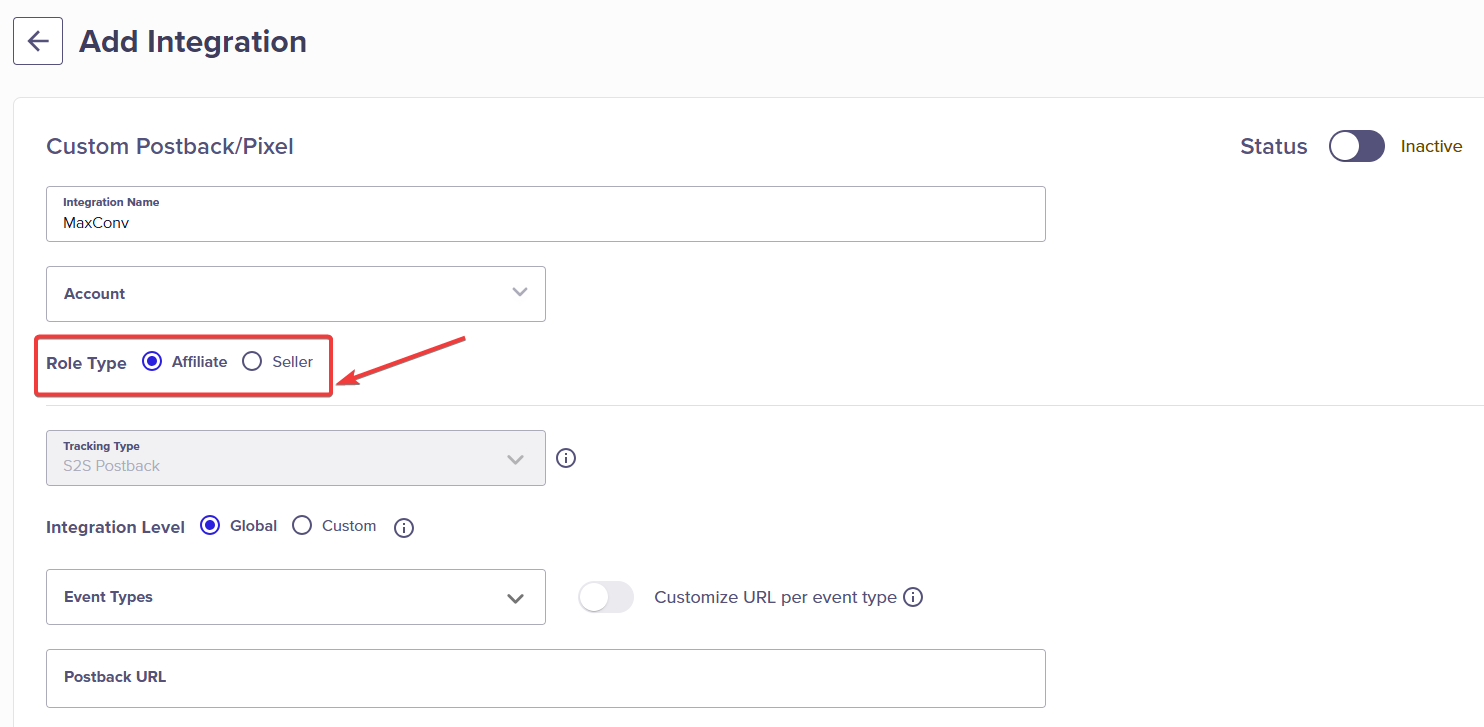
- Select the role (affiliate or seller) you are operating as in that account nickname.
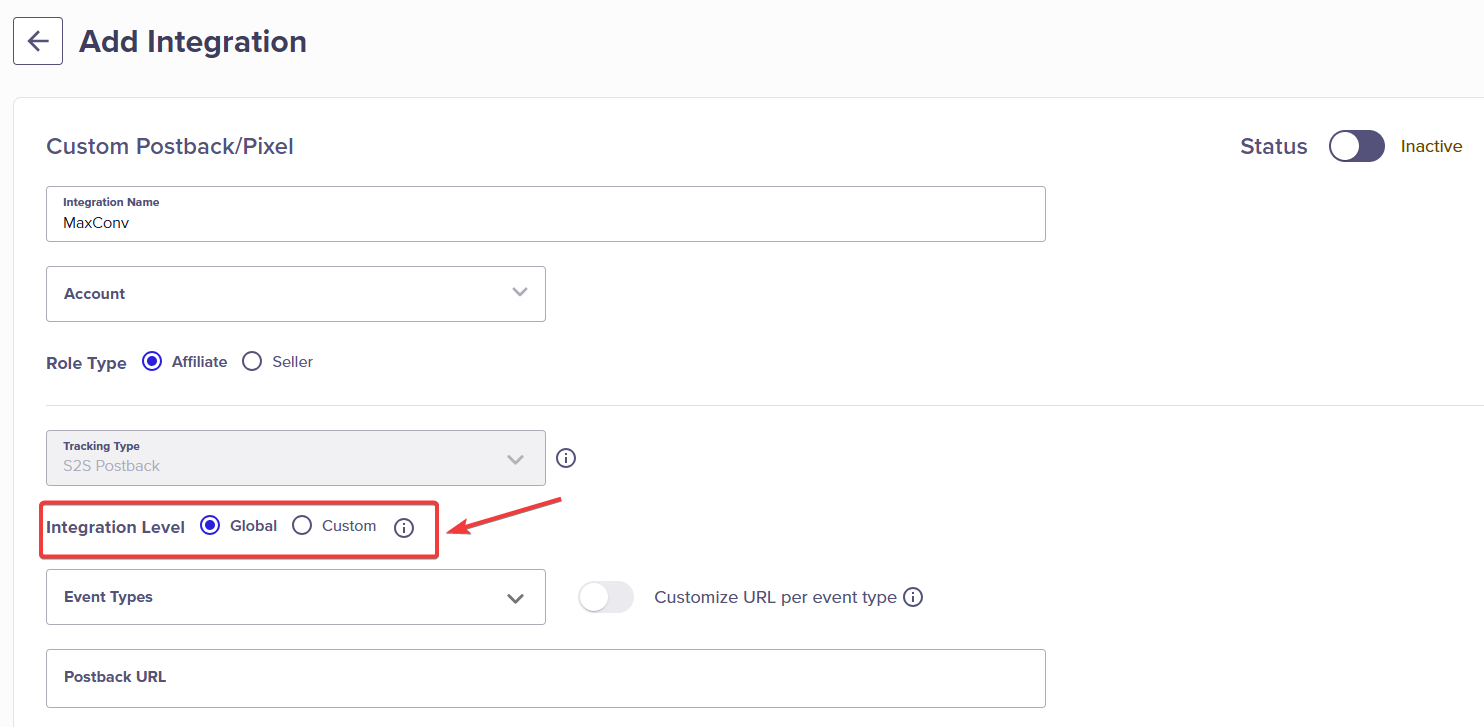
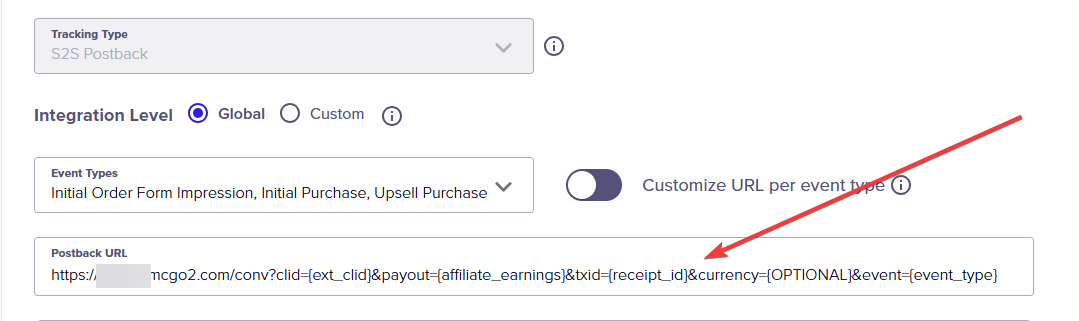
- Select "Global" in the integration level.
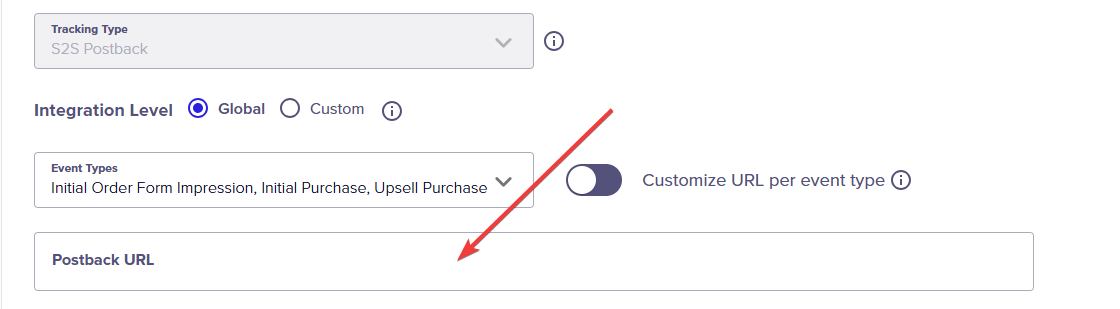
- Select all event types, turn off the "Customize URL per event type" option.

- Now we need to fill the "Postback URL". To get this URL, login your MaxConv Dashboard
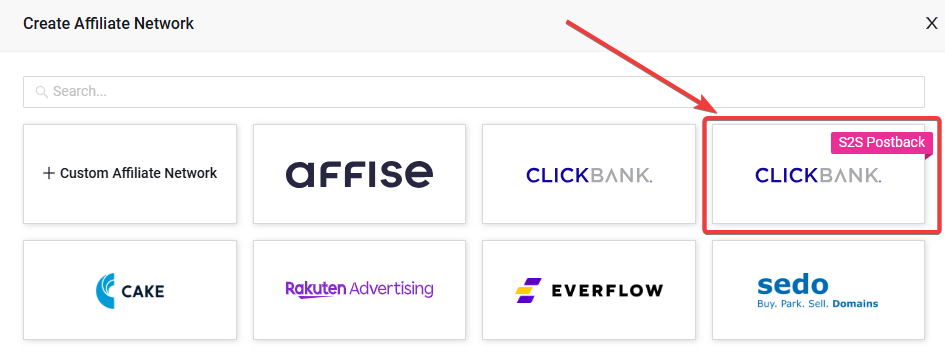
- Select Affiliate Networks from the navigation menu on the top of the screen. Then, click on the green Create Button.

- Click on the pre-defined "Clickbank" (with S2S Postback) template. Note: The other "Clickbank" template without "S2S Postback" is the old integration that uses INS & ISR.
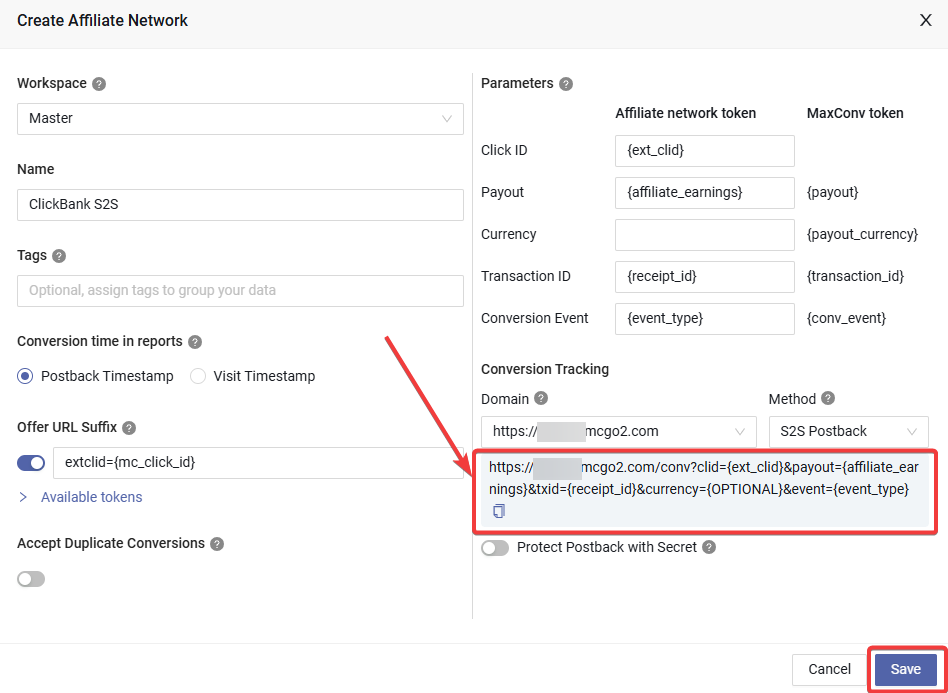
- Copy the S2S postback URL to your clipboard, then click the "Save" button to create it as new affiliate network in MaxConv.
- Switch back to the Clickbank "Add Integration" webpage, paste the S2S postback URL that you have copied from MaxConv.
Click the "Save" button to create integration in Clickbank.
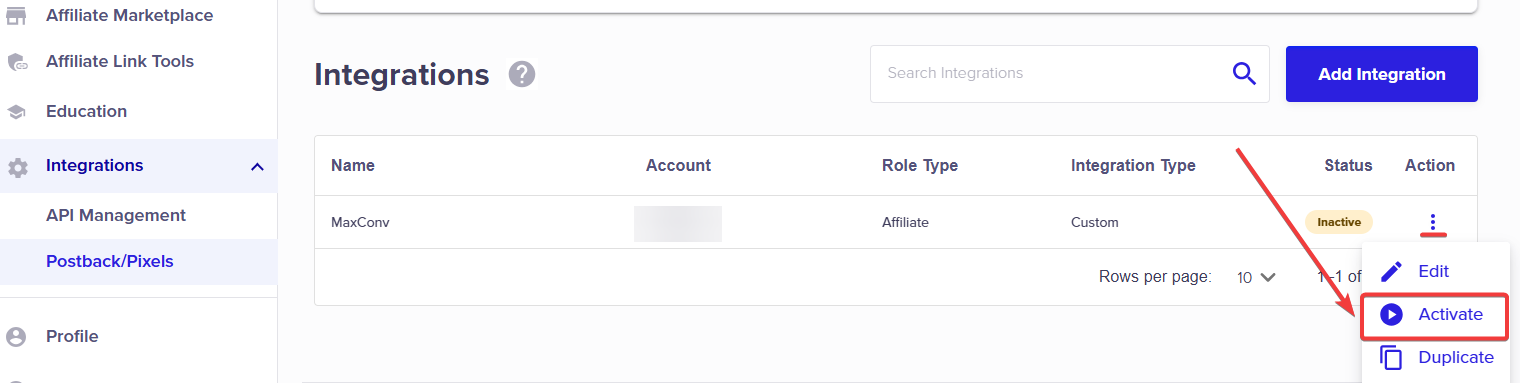
After saving the integration, click the three dots to open the quick Action menu, select Activate to enable the integration.
That's all set!
Part II. Create Custom Conversions
Next, we will need to create custom conversions to capture Order Form Impression, Purchase, and Upsell, so you can check these metrics on different reports like ad reports or keyword reports.
- Login MaxConv Dashboard.
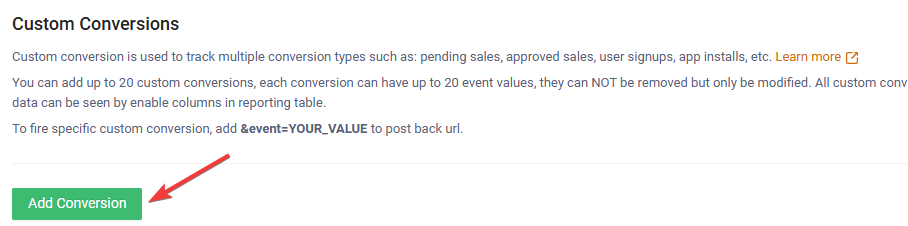
- Click on the Measurement menu on the top right of the screen, then choose Custom Conversion menu.

- Click on the green Add Conversion button.
- Create a Order Form Impression conversion, like the screenshot below:

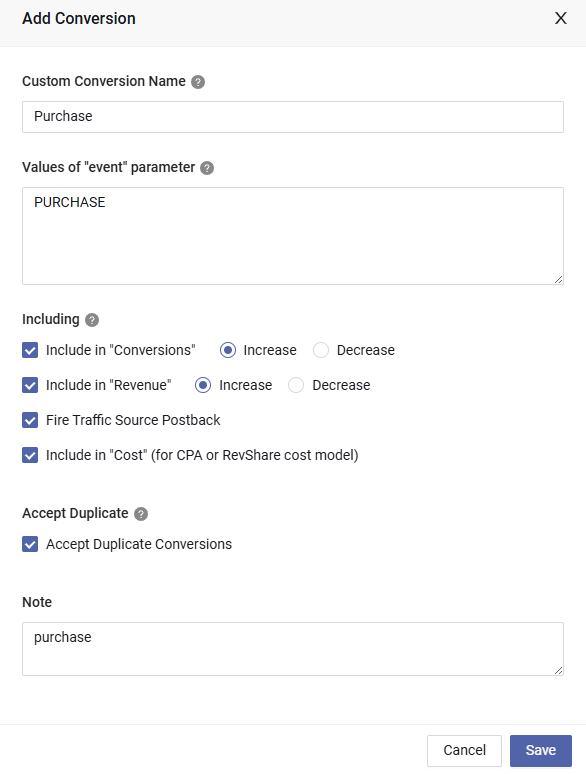
- Create a Purchase conversion, like the screenshot below:
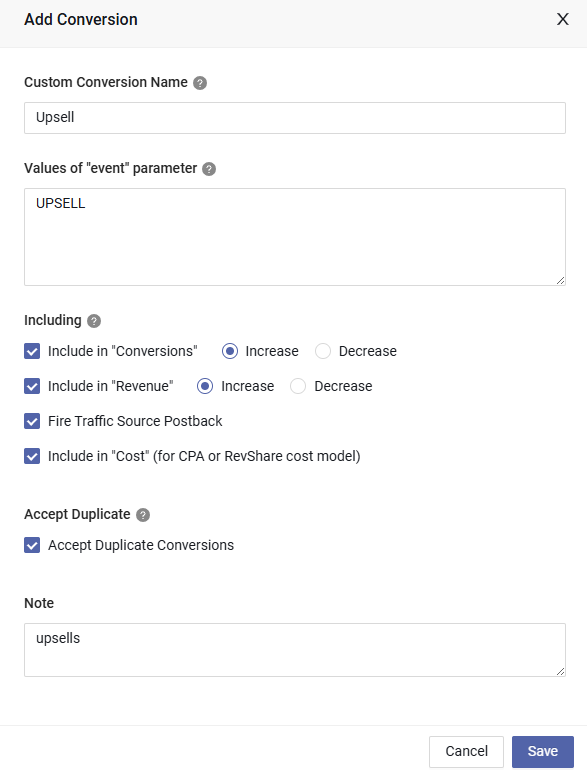
- Create a Upsell conversion, like the screenshot below:
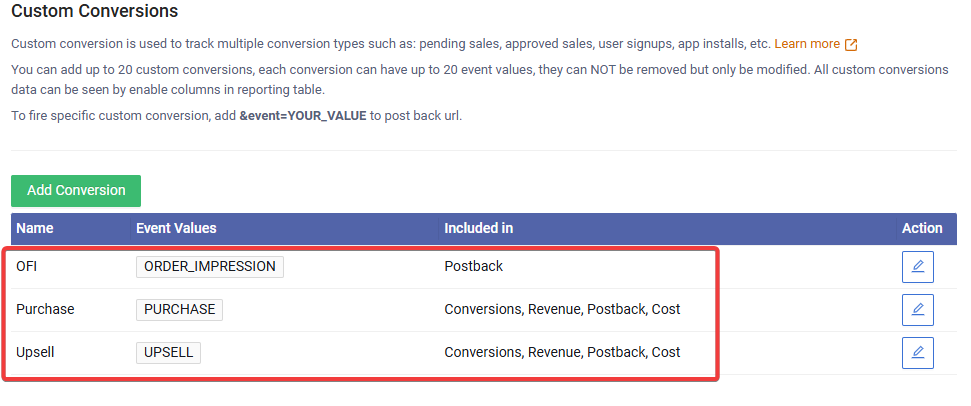
- After creating these three custom conversions, they should look like this:
- Enable these metrics on campaign page so you can check it in the report, go to the Campaigns menu in MaxConv, and then click the Columns button on the top right of the table.

- Enable these three metrics and then click the Apply button.
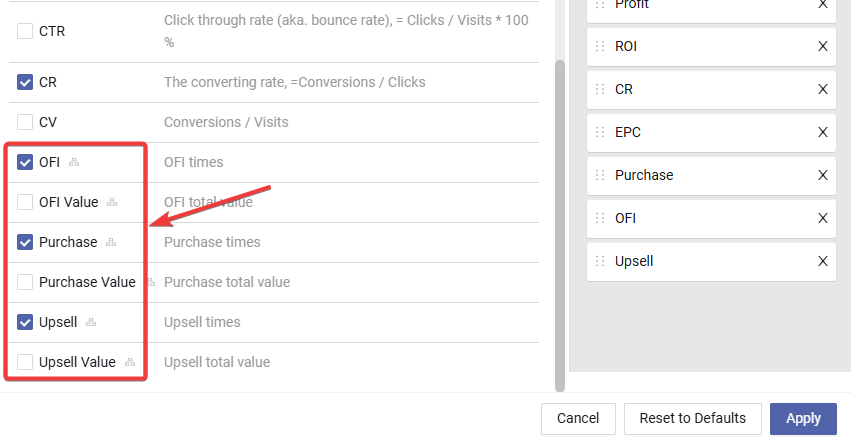
- Now you can check these three metrics on the campaigns. Note: If you want to enable these metrics on other reports, just repeat above steps.

Part III. (Optional) Create a Campaign to Test Integration
After creating integrations and custom conversions, everything is done. You may want to run a test in the real world to see if it works. Follow these steps:
Log in to your ClickBank account, and then go to the Affiliate Marketplace on the left vertical menu.
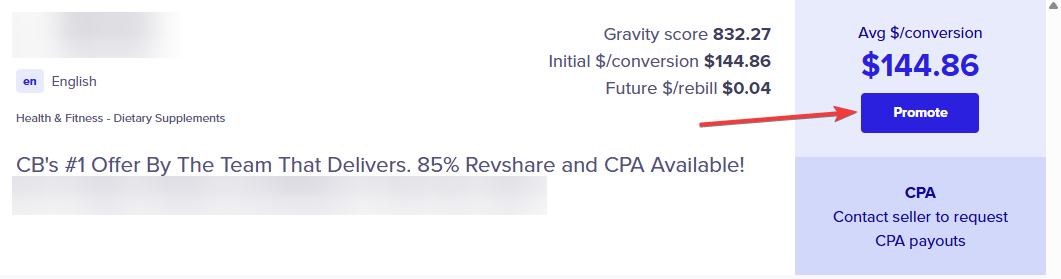
Find a product that you would like to test, click the Promote link.
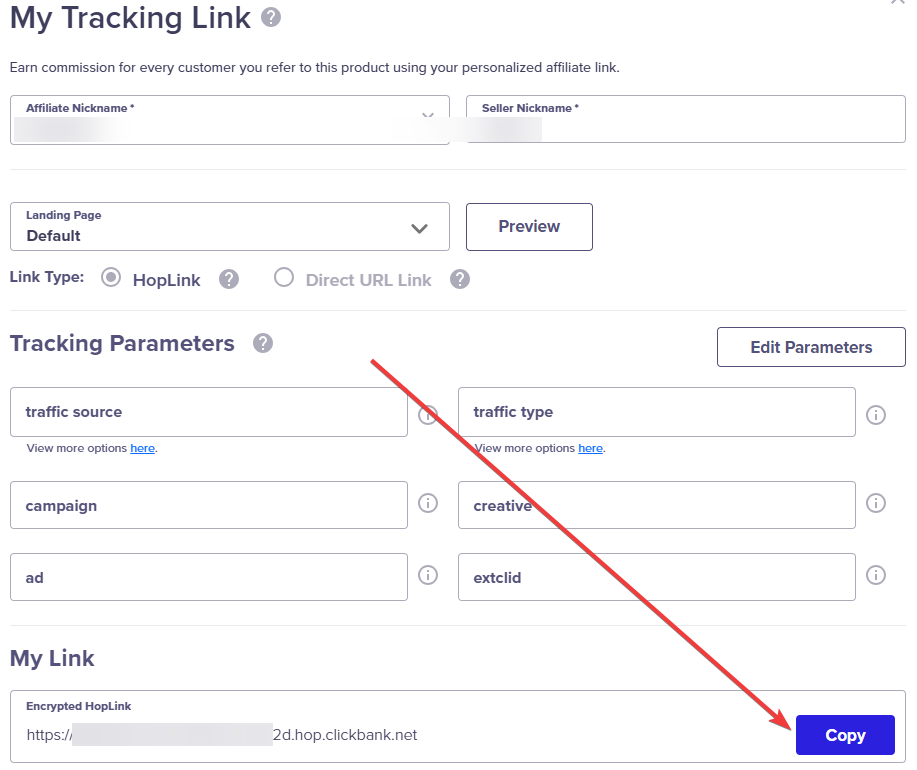
- Choose the affiliate nick name that you want to promote with, then click the Copy button to copy the Clickbank tracking link. Note: You don't need to add any tracking parameters.
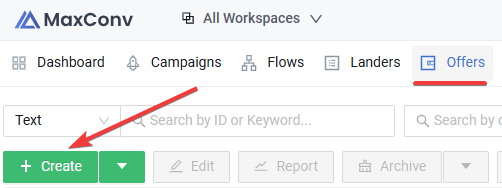
- Go to the MaxConv dashboard, click the Offer menu on the top menu, and then click the green Create button.
- Fill the form. Name is the product name, for Affiliate Network field, choose "Clickbank", you have created it in the Part I. For URL field, paste the clickbank tracking link you have copied from affiliate marketplace.
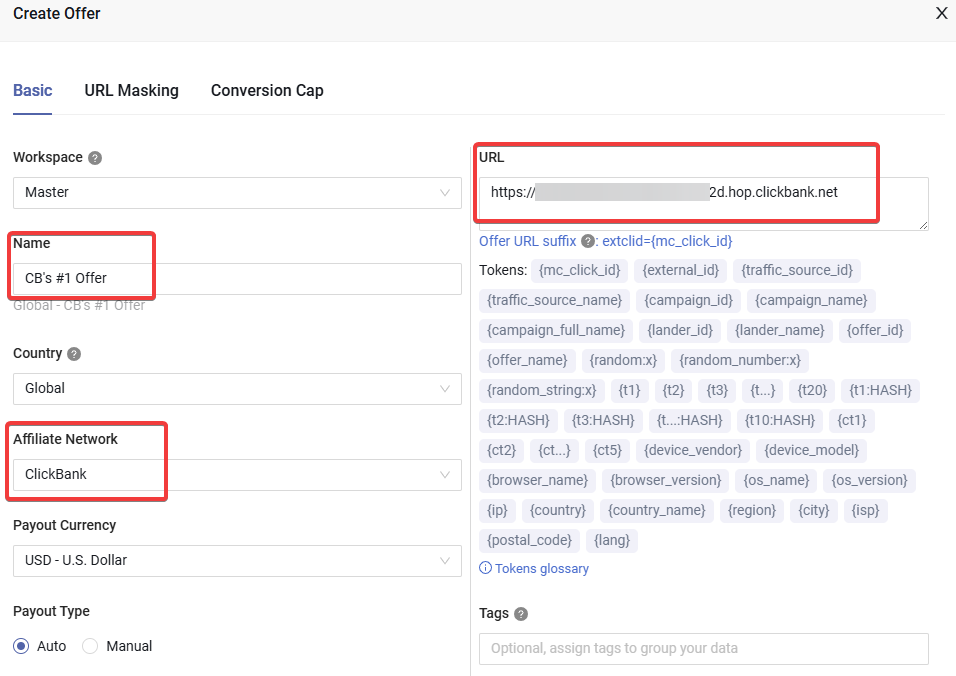
Click the Save button to create offer.
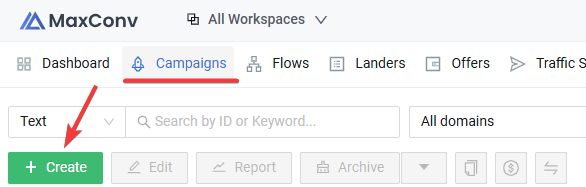
Click the Campaign menu on the top menu, and then click the green Create button.
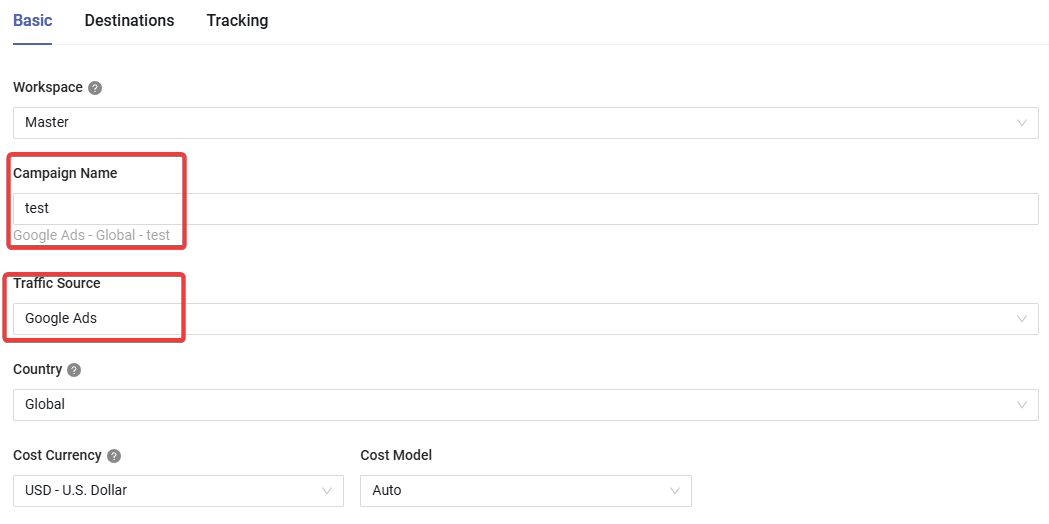
- Provide a campaign name, and then choose a traffic source. Note: If you have no traffic source, create one.
- Switch to the Destinations tab. Since we are testing so we turn off the landers (aka. landing page) to make it simple, then choose the offer that we created before.

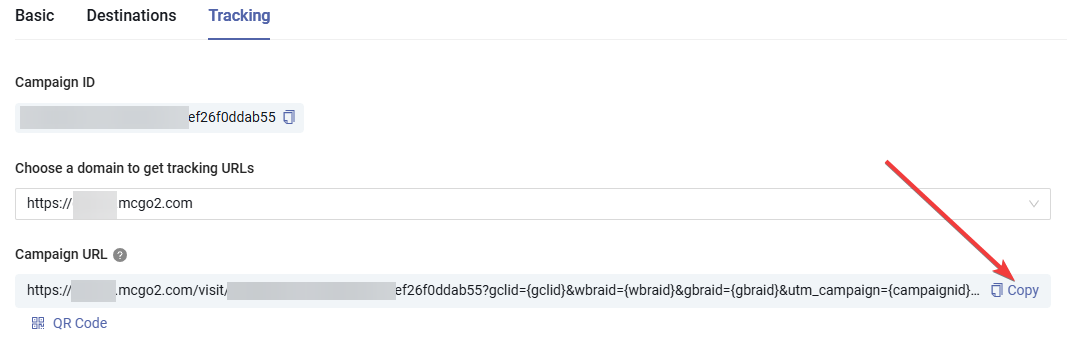
- Click the Save button to create campaign, you will see the tracking details in the Tracking tab. Copy the "Campaign URL", open it in your browser.
- Now you should get redirected to the product page, find the CTA (call to action) button, click it to go to the order form.
- After arriving at order form, stay for 2~5 seconds to ensure the page is fully loaded.
- Now MaxConv should show a order form impression (OFI), right? Let's check! Go to the Campaigns page in MaxConv dashboard, hit the Refresh button.

There is our "Order form impression"! So our integration works perfectly now.
If you didn't see the right result, check our FAQ below to find possible reasons and solutions.
Upgrade from Existing INS & ISR Integration to New S2S Integration
If you are currently using the old tracking integrations (like Integrated Sales Reporting tracking pixels or Instant Notification Service) you may want to transition your integrations to the new S2S Postback/Pixels feature to take advantage of the additional benefits.
Part I. Create new Integration
The first step is to create a new integration, follow the Create Integration Guide above to create it.
Part II. Update Existing Custom Conversion
- Find the "OFI" (Order Form Impression) custom conversion, edit it and add
ORDER_IMPRESSIONto theValues of "event" parameterfield:

- Add other two custom conversions as described in Create Custom Conversions
Part III. Associate all Offers with new Clickbank affiliate network
You have created a new ClickBank (with S2S) affiliate network when creating the integration. Now please update all offers and associate them with the new ClickBank affiliate network.
Part IV. Deactivate old INS & ISR
Now its time to deactivate the old INS & ISR integration. Please log in to your ClickBank account and remove/deactivate INS & ISR.
FAQ
1. I can't see the right result when testing integration, what should I do?
Check a few things:
Ensure you have created the integration in ClickBank as this document described, and the integration is Activated.
Ensure you have created the clickbank affiliate network in MaxConv as described above.
Ensure that all created offers in MaxConv have chosen the new "clickbank" affiliate network.
Ensure that all created offers have no "extclid" parameter in the URL.
If you have checked all these things and still can not get integration work, please share your campaign URL with support@maxconv.com, we will help to get it solved.