Google Ads Integration
MaxConv has integrated with Google Ads, the integration provides the following benefits:
- Send conversions (including custom conversions) to Google Ads.
- Synchronize your campaign costs with MaxConv.
- Manage Google Ads campaign status within MaxConv.
Part 1. (Optional) Create or choose the Google Ads conversion action.
You will only need to complete this step if you would like to send conversions to Google Ads.
To create a Google Ads conversion action, follow these steps:
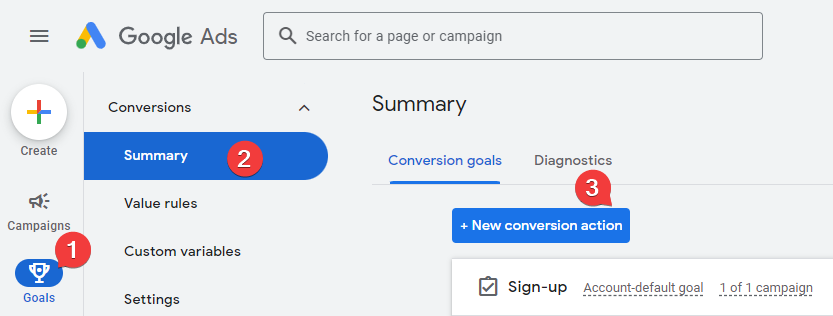
Sign in your Google Ads account, click the Goals menu.
Click the Summary menu.
Click the New conversion action button.
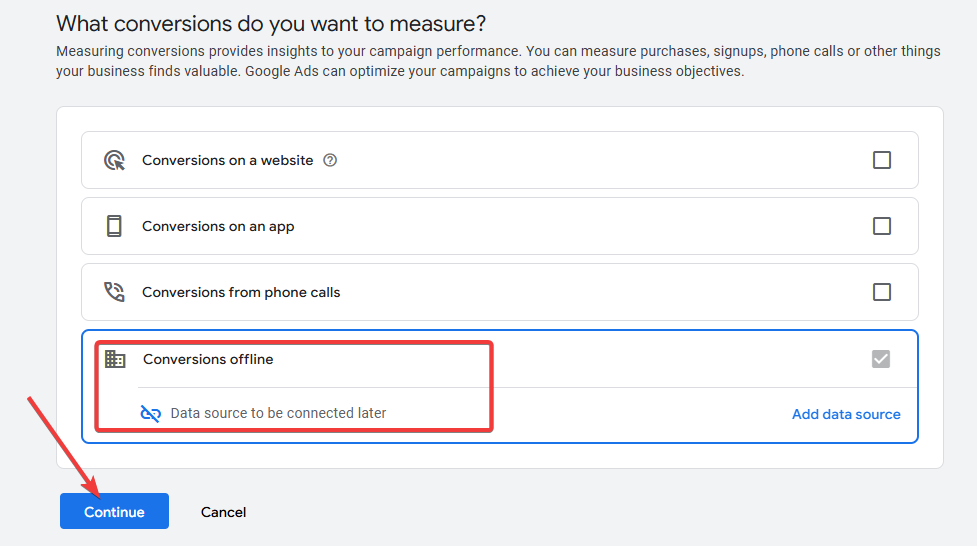
- Choose the "Conversions offline" and then click on the Continue button.
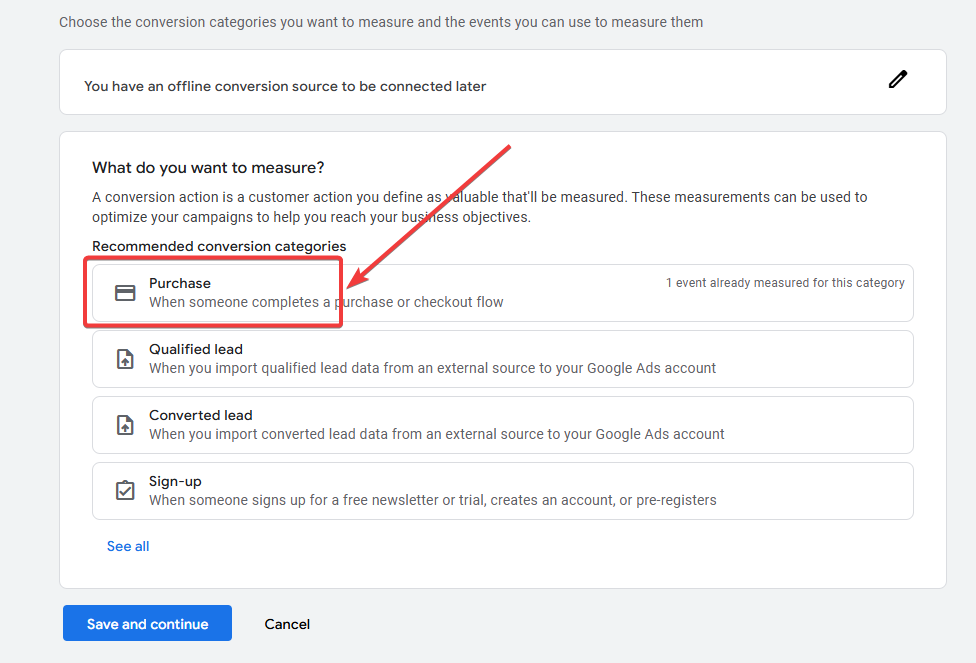
- Choose conversion category, let's choose "Purchase" in this document, you can choose any other category based on your business.
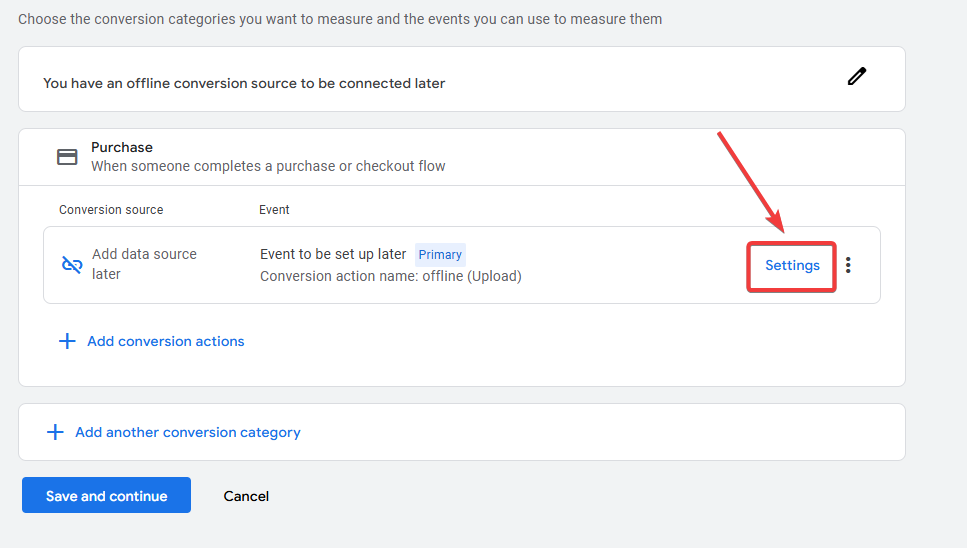
- Click on the Add conversion actions button, then click Add data source later.

- Click on the Settings button of new conversion action.
- Provide conversion goal and conversion name, it's recommended to use URL-safe characters for conversion name, you can enter any name here, but please remember the name, we'll need the same name in the subsequent steps.
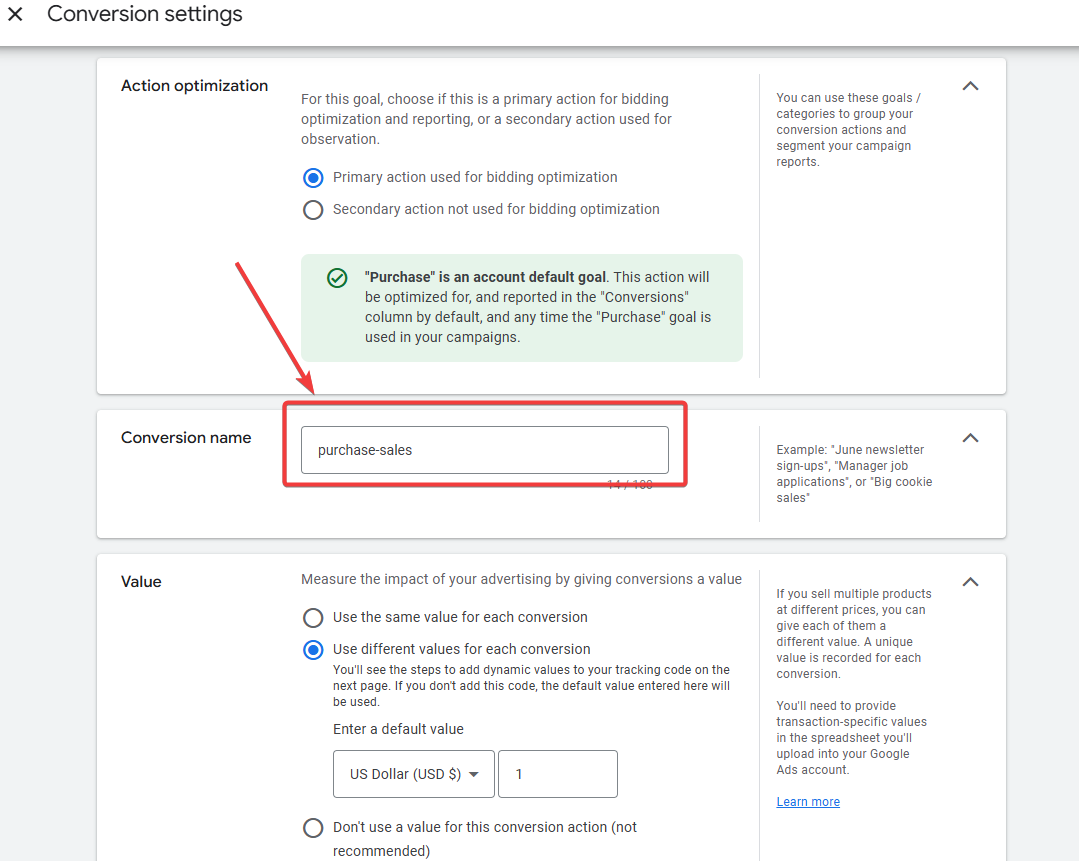
The URL-safe characters are letters, numbers, - and _.
Adjust other settings based on your needs and then click Done button.
Click the Save and Continue button.
All set now!
Part 2. Setting Up integration
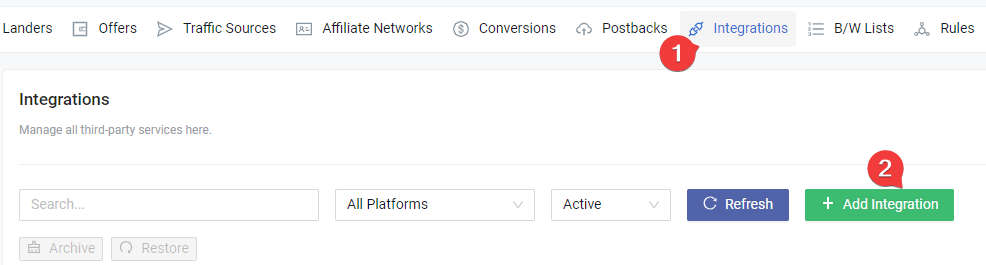
Click on the Integrations menu in the MaxConv dashboard.
Click the Add Integration button.

- On the integration list, click on the Google Ads card.
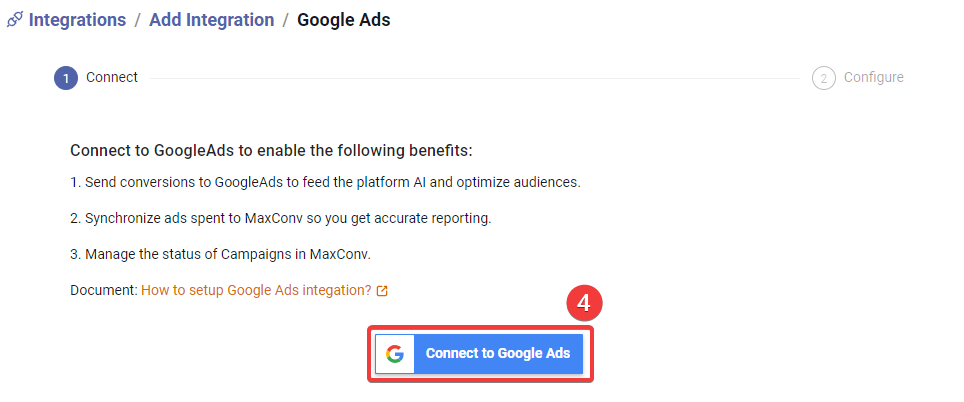
Click the Connect to Google Ads button, log in to your Google Ads account in the pop-up window and accept the authorization.
After authorization, MaxConv will try to connect immediately, wait until you are redirected to the next step.
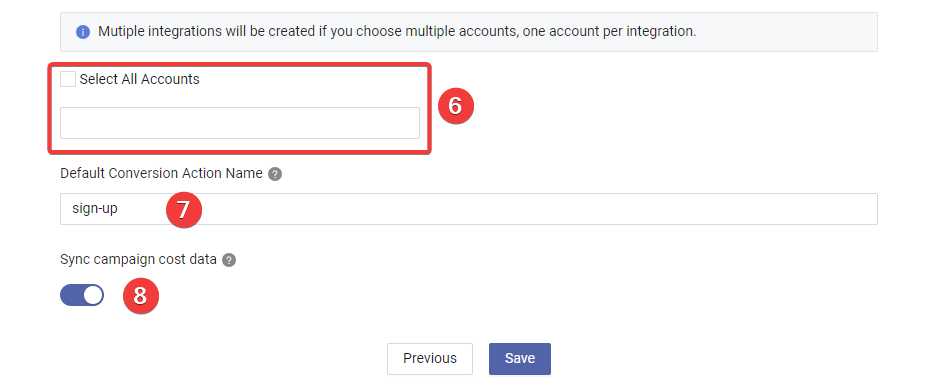
Choose the Google ads accounts that you want to integrate, you can also integrate all account by enable the Select All Accounts option.
(Optional) Enter the same conversion action name that you created in part 1; if you skip providing a name here, you can provide the name when generating the postback URL.
Whether do you want to synchronize campaign cost data or not.
Click Save button to create the integration.
Part 3. Setting Up traffic source
The next part is to create a traffic source with the postback URL of integration, so MaxConv can send conversions data to Google Ads.

- Find your integration row in the table, click the Generate button to generate a postback URL.
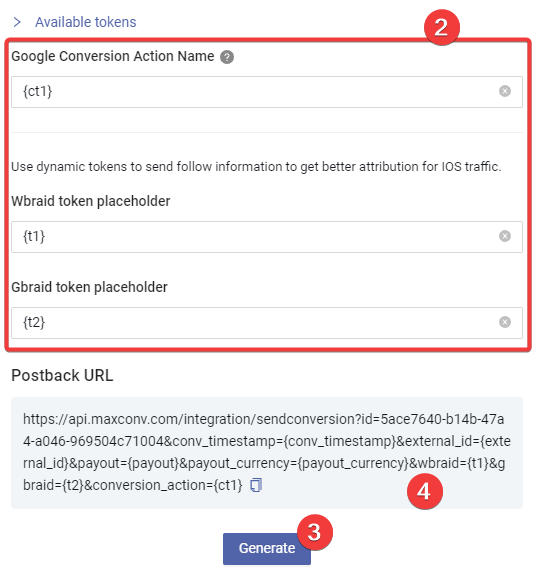
Provide all the necessary data, you can hardcode any value or use the dynamic tokens. We recommend using the dynamic token as shown in the screenshot.
tipThe
{ct1}token is the campaign token 1, use this token in the conversion action name so you can send conversions to different conversion action in different campaign.Click the Generate button.
Copy the postback URL to any text editor, you will need this URL in subsequent steps.
Go to the Traffic Source menu in MaxConv, click the Create to create a traffic source.
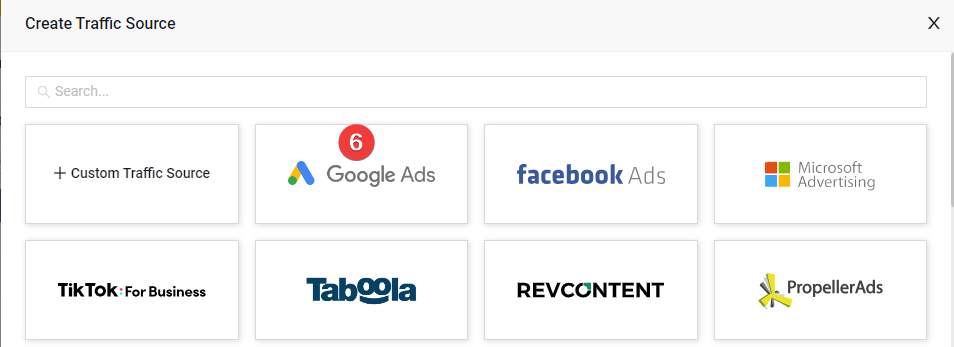
- Click the Google Ads card in the template list.
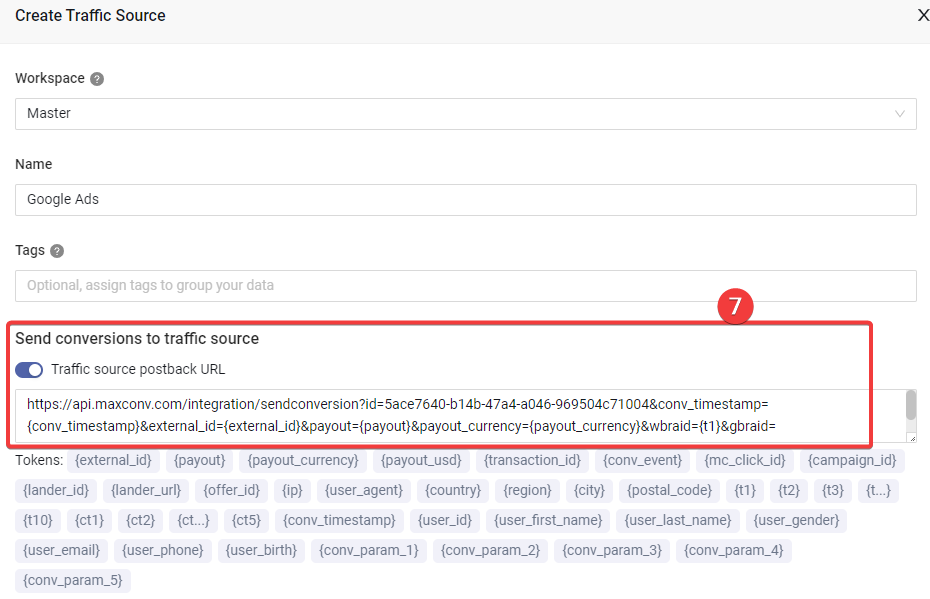
- Enable the Traffic source postback URL option and paste the postback URL you copied in step 4 into the text box.

Google Ads doesn't like third party redirects, so select Direct in the Default Ad to Campaign Transition field, all new campaigns with this traffic source will have their Ad to Campaign Transition set to Direct.
Adjust other settings as needed, and then click the Save button to create the Google Ads traffic source.
Part 4. Setting Up MaxConv campaign
Now you can start creating campaign in MaxConv.
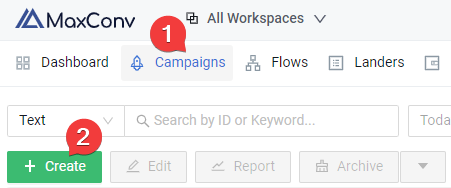
Click on the Campaigns menu in MaxConv dashboard.
Click the Create button.
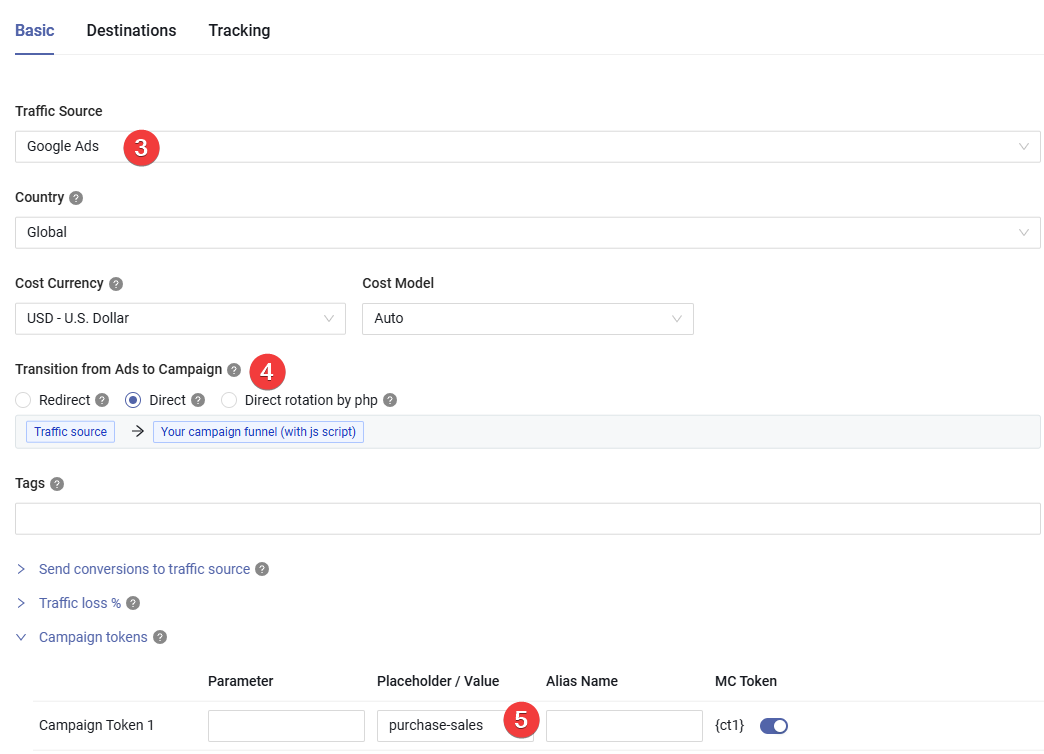
Choose the traffic source you have created in the Part 3
Make sure the Transition from Ads to Campaign is set to Direct.
Type the conversion action name into the Placeholder of
campaign token 1, if you want to send conversions to other conversion action, type other name here.tipIf you skip providing a value for
campaign token 1, MaxConv will use the integration's default conversion action.
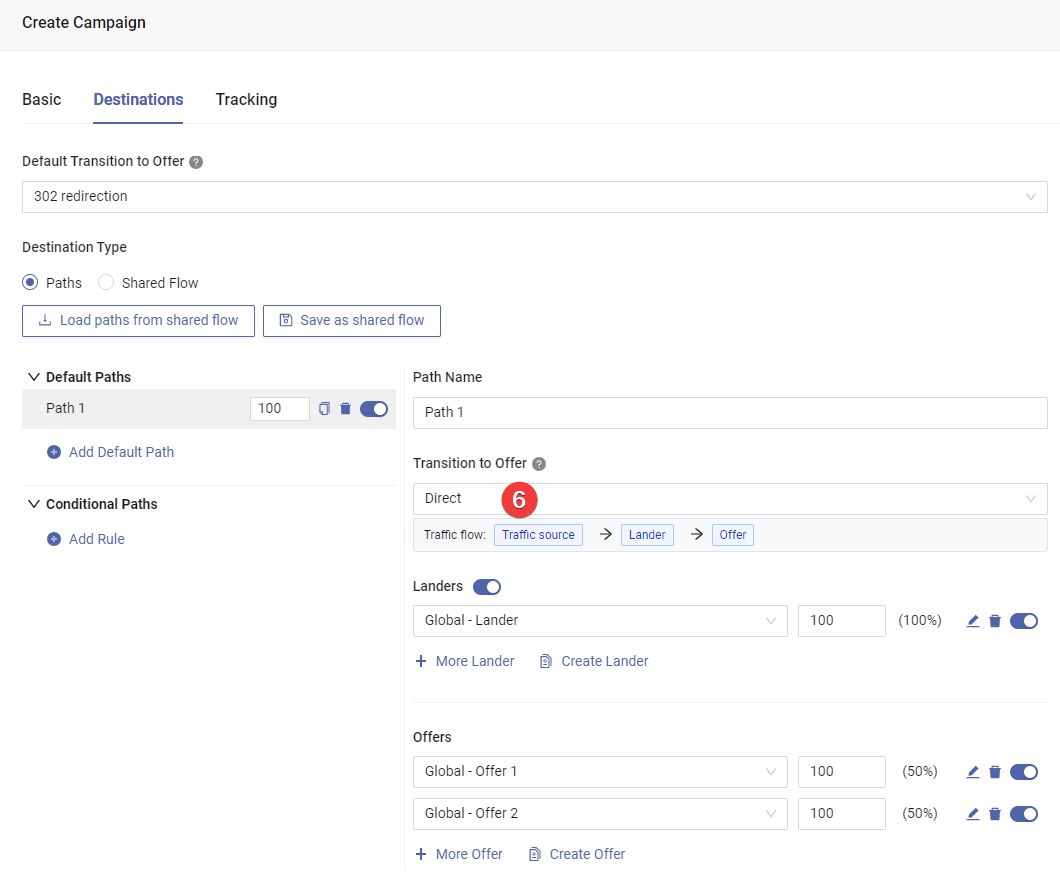
Add your landers and offers in the Destinations, set
Transition to Offerfield to DirectClick the Save button to create campaign.
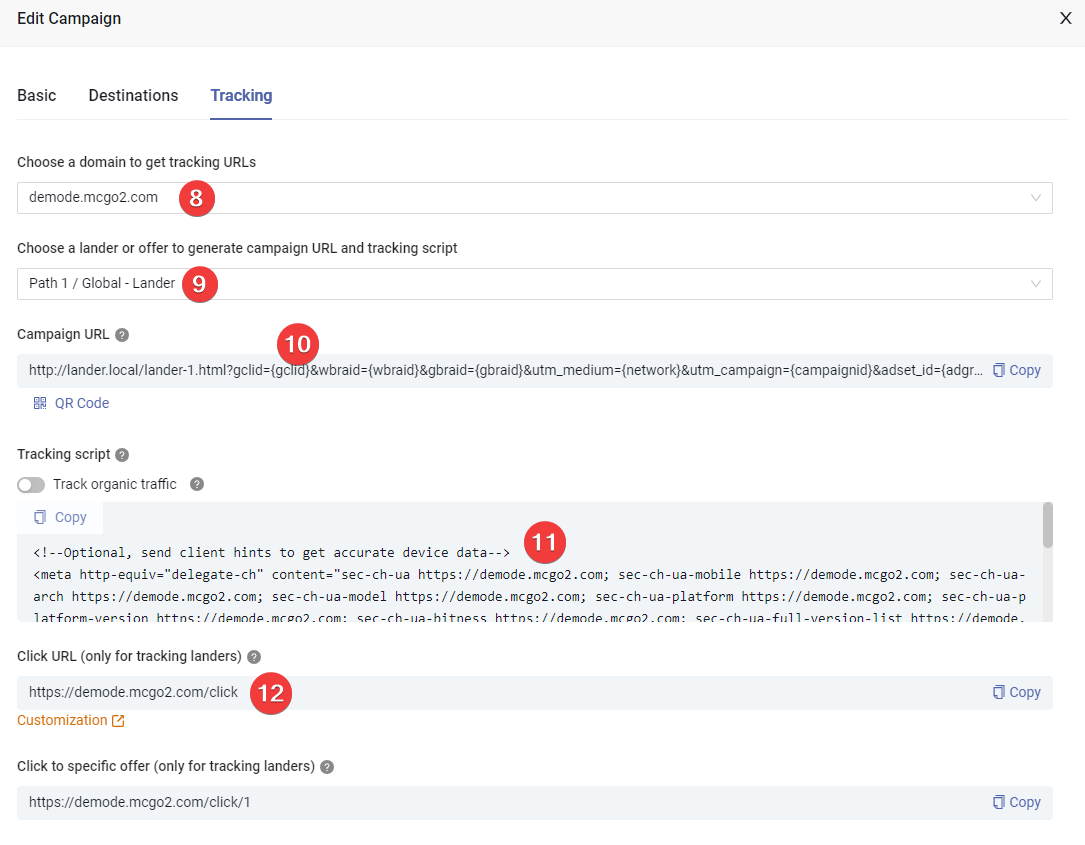
On the Tracking tab, choose your preferred tracking domain.
Choose the lander that you want to send traffic to.
Copy the campaign URL to any text editor, use this URL to set up campaign in Google Ads.
Copy the tracking script and paste it into the
<head>...</head>of your lander's HTML.Copy the click URL and paste it into the link of the CTA button on the lander.
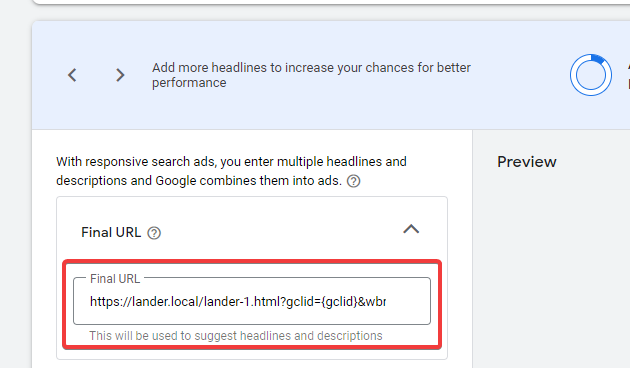
Part 5. Setting Up Google Ads campaign
Login to your Google Ads account and create campaign, adjust basic settings, when creating ad, paste the Campaign URL you copied from Part 4 into the Final URL field.
Part 6. Match the MaxConv campaign with Google Ads campaign
To enable cost synchronization, you need to match the MaxConv campaign with a Google Ads campaign so that MaxConv knows where to pull cost data, to start campaign matching, perform following steps.
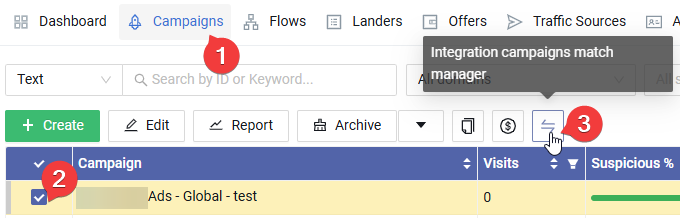
Click on the Campaigns menu in MaxConv dashboard.
Check the campaign that you want to match.
Click the Integration Campaign Match Manager button.
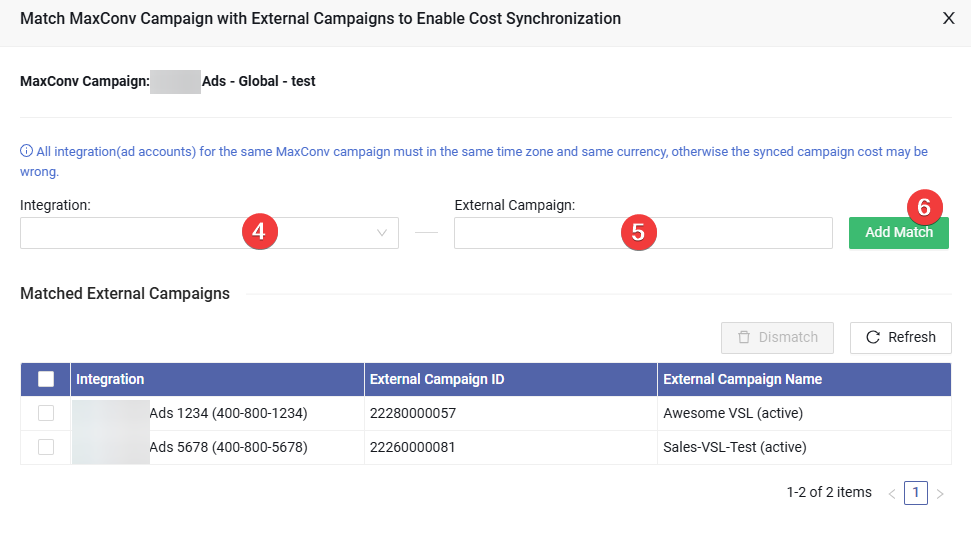
Choose the integration, MaxConv will try to pull a campaign list from that integration, wait until it loaded.
Choose all the campaigns that you want to match, you can choose multiple campaigns at a time.
Click the Add Match button to save the matching.
Once matched, you will see a Google Ads icon in front of the campaign name in the Campaigns section of the MaxConv dashboard, and MaxConv will begin synchronizing cost data within an hour.
![]()
Manage campaign status in MaxConv
To manage Google Ads campaign status within MaxConv, follow these steps:
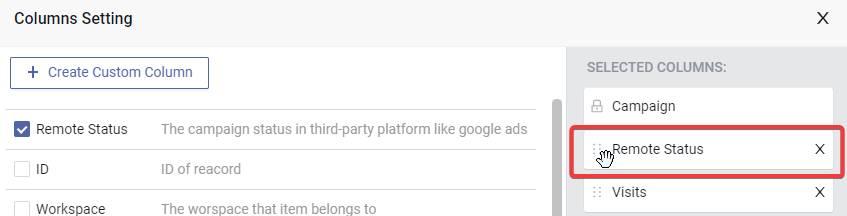
- Click the Columns setting at the top right of the table.

- Enable the Remote Status column, drag it to the top, then click the Apply button.
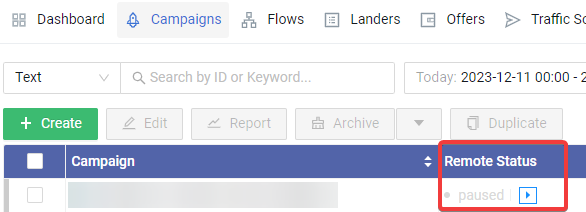
- You can now view the Google Ads campaign status, as well as start or pause it by clicking the "play" or "pause" icon.
FAQ
Have questions? Check Integration FAQ