Facebook (Meta) Ads Integration
MaxConv has integrated with Facebook (Meta) Ads, the integration provides the following benefits:
- Send conversions (including custom conversions) to Facebook (Meta) Ads.
- Synchronize your campaign costs with MaxConv.
- Manage Facebook (Meta) Ads campaign status within MaxConv.
Part 1. Setting Up integration
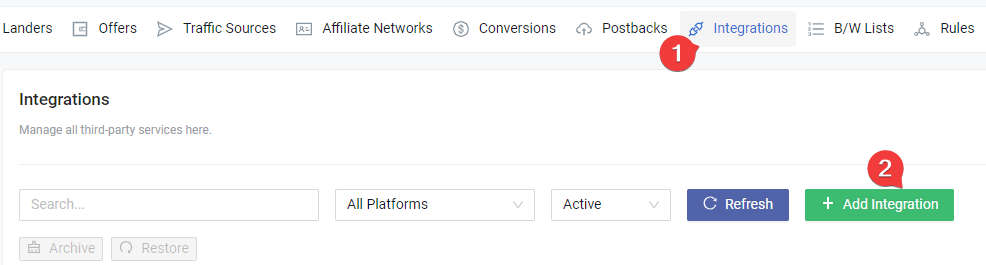
Click on the Integrations menu in the MaxConv dashboard.
Click the Add Integration button.

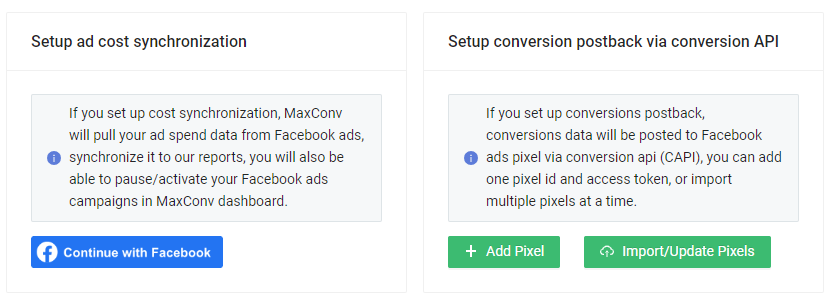
- On the integration list, click on the Facebook Ads card.
Facebook Ads integration provides two features: ad cost sync and conversion postback. You can choose to use one or both integrations. See the steps below.
Part 1.I Setup ad cost synchronization
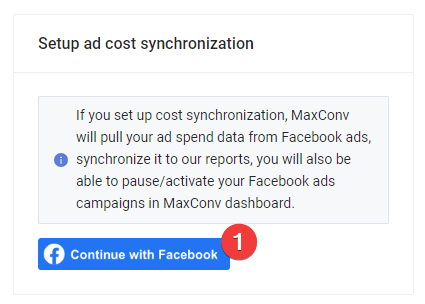
Click the Continue with Facebook button and log in to your Facebook account in the pop-up window, accept the authorization.
After authorization, MaxConv will try to connect immediately, wait until you are redirected to next step.
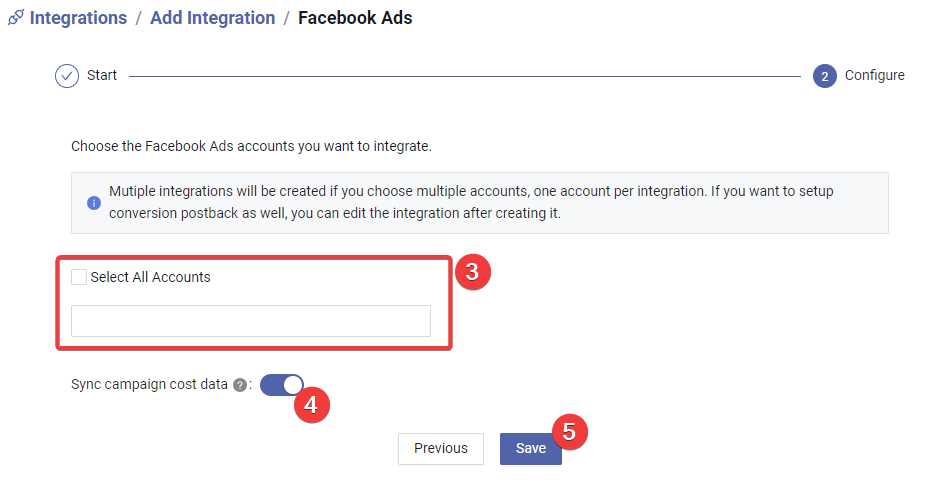
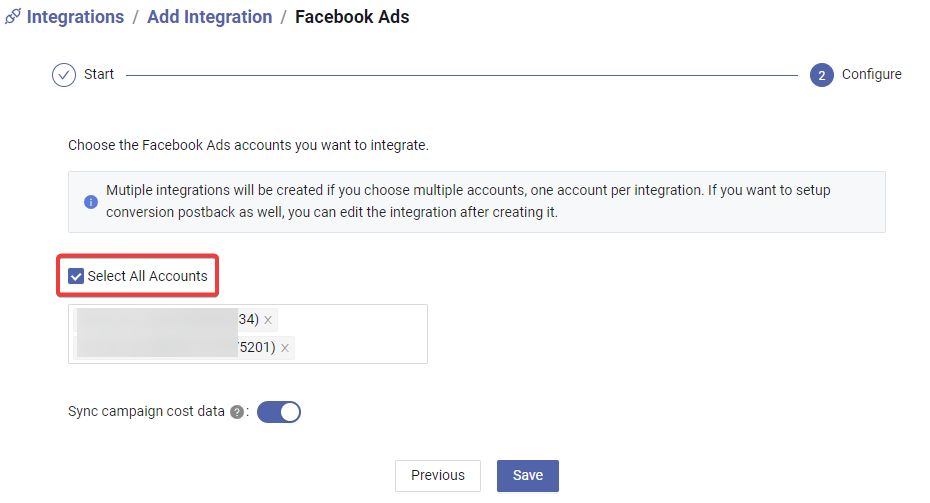
Choose the Facebook ads accounts that you want to integrate, you can also integrate all account by enable the Select All Accounts option.
Whether do you want to synchronize campaign cost data or not.
Click Save button to create the integration.
Part 1.II Setup pixel
To setup pixel, follow the steps below.
![]()
- Click the Add Pixel button.
![]()
Type your pixel name, this is for your personal reference only.
Type the Facebook pixel id.
Generate the access token under the Settings section of the pixel in your Facebook Ads Dashboard, copy and paste it here.
(Optional) If the pixel is a newly created pixel, you can click the Warm Pixel button to send 10 ViewContent events so that you can select this pixel when creating a Facebook Ads campaign.
(Optional) Type the event source URL, if you skip providing URL here, you can provide it when generating postback URL.
(Optional) Type the event name, if you skip providing name here, you can provide it when generating postback URL.
Click the Save button to create integration.
Batch import pixels
The ability to import pixels in batches can be very useful when working with hundreds of facebook ads account, to start importing, follow these steps
![]()
- Click the Import/Update Pixels button.
![]()
Download the template excel file.
Edit the template, fill with all your pixel data, and then upload it.
Best practices for creating multiple integrations with ad cost sync as well as conversion postback
If you want to setup multiple integrations, enable the ad cost sync as well as conversion postback, follow below best practice:
Click the Continue with Facebook button and log in to your Facebook account in the pop-up window, accept the authorization.
After authorization, MaxConv will try to connect immediately, wait until you are redirected to next step.
Enable the Select All Accounts option to integrate all ad accounts.
Adjust other settings, and then click the Save button to create integrations, one integration per ad account.
![]()
Now you need to update all integrations with pixels data, click the Import/Update Pixels button.
Download the template excel file, open it.
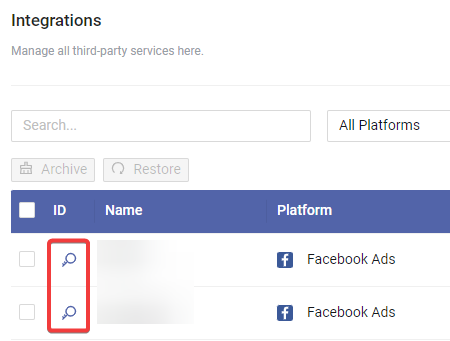
- On the integration list, find all integration id.

Copy and paste ids to the Integration ID (Optional) row, provide corresponding pixel data.
Then upload the excel file to import those pixels.
Now all integrations have cost sync integrated, and they also have pixel data too.
Part 2. Setting Up traffic source to send conversions data to Facebook pixel
The next part is to create a traffic source with the postback URL of integration, so MaxConv can send conversions data to Facebook Ads via conversion API(CAPI).

- Find your integration row in the table, click the Generate button to generate postback URL.
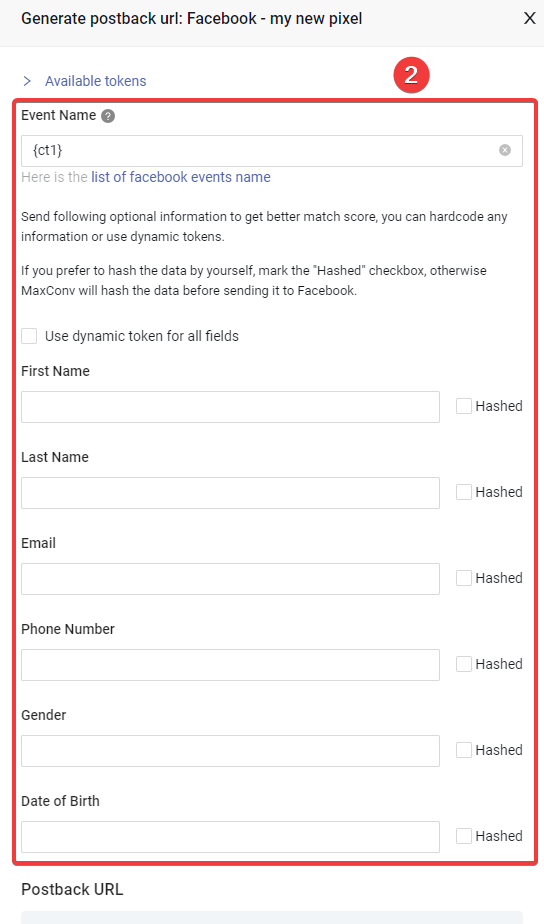
Provide all the necessary data, you can hardcode any value or use the dynamic tokens. We recommend using the dynamic token
{ct1}in the Event Name as shown in the screenshot.tipThe
{ct1}token is the campaign token 1, use this token in the event name so you can send with different event name for different campaign.You can also use static event name here, like "Lead", then MaxConv will always send conversions data as "Lead" event.
Click the Generate button, and copy the postback URL to any text editor, you will need this URL in subsequent steps.
Go to the Traffic Source menu in MaxConv, click the Create to create a traffic source.
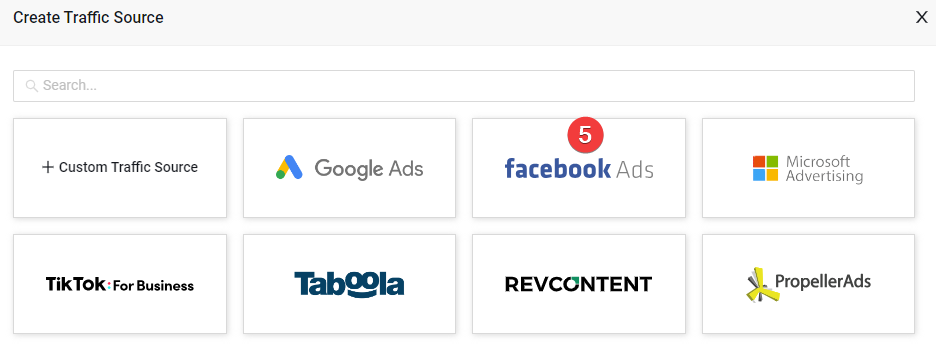
- Click on the Facebook Ads card of template list.
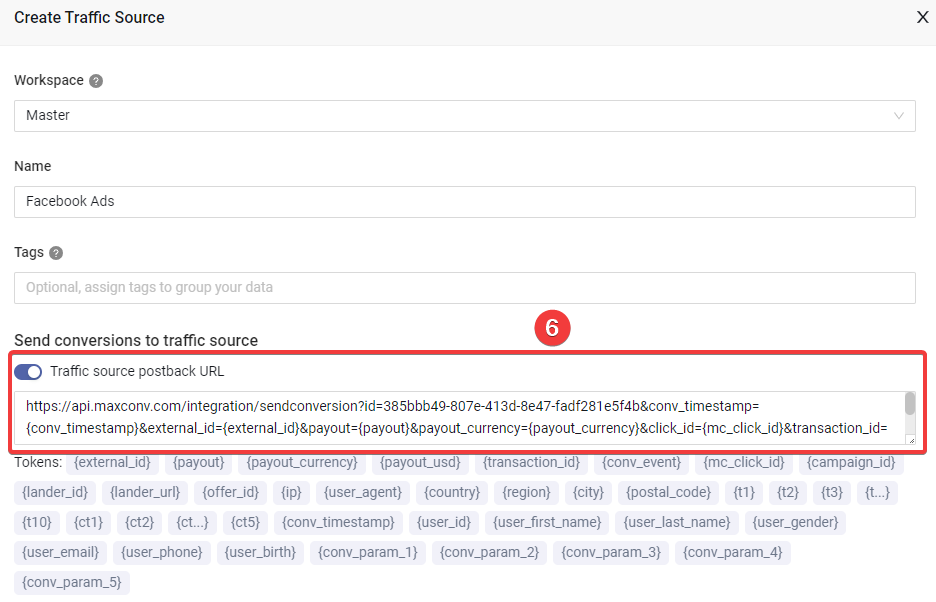
- Enable the Traffic source postback URL option and paste the postback URL you copied in step 3 into the text box.

Facebook Ads doesn't like third party redirects, so select Direct in the Default Ad to Campaign Transition field, all new campaigns with this traffic source will have their Ad to Campaign Transition set to Direct.
Adjust other settings as needed, and then click the Save button to create the Facebook Ads traffic source.
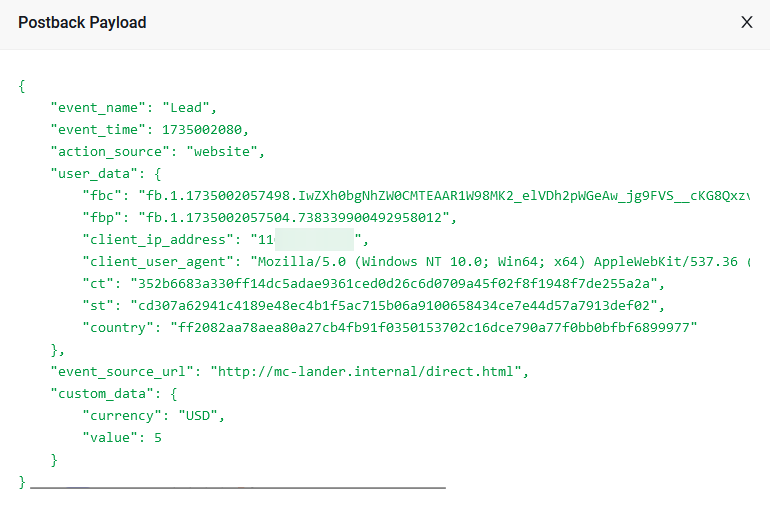
Best effort conversions data sending
MaxConv will collect all the information we have and send all of them to facebook ads, allowing for very high Match Quality scores even without a Facebook Click ID.
The data we send to the Facebook pixel includes:
- Facebook click id (fbclid)
- Facebook browser ID (requires installation of the Facebook pixel javascript on the landing page)
- IP address
- User agent
- Country
- Region / State
- City
- Postal code
If you are able to provide user's identifiable information, such as email, phone number...etc, MaxConv will also hash them and send them to facebook pixel, please check the Send PII to facebook part for more information.
Facebook pixel javascript installation
There may be no fbclid value passed in specific scenarios, such as some in-app traffic. To solve this, you can install the Facebook pixel on your landing page. MaxConv will try to extract _fbc and _fbp values from the cookie. They stand for Facebook click ID and Facebook browser ID, which can improve the match quality.
To enable the _fbc and _fbp extraction, please install the Facebook pixel javascript before the MaxConv tracking script.
So MaxConv is aware that Facebook Pixel is installed. Our script will try to check whether the JavaScript variable fbq is defined. If it is defined by Facebook Pixel, our script will keep trying to extract _fbc and _fbp from the cookie for a maximum of 10 seconds.
If you generate a postback URL from an old integration, check your postback URL to see if it contains &fbp={fbp}. If not, please add it manually to send the browser ID to the Facebook pixel. Your postback URL should look like below:

Send PII to facebook
To send PII to facebook, you need to send those information via S2S postback url
PII (personally identifiable information) is information that can be used to distinguish or trace an individual's identity, such as first name and last name, email, phone number, etc.
Sending this data to Facebook can increase the match quality for your Facebook ads account.
To send PII, follow below steps:
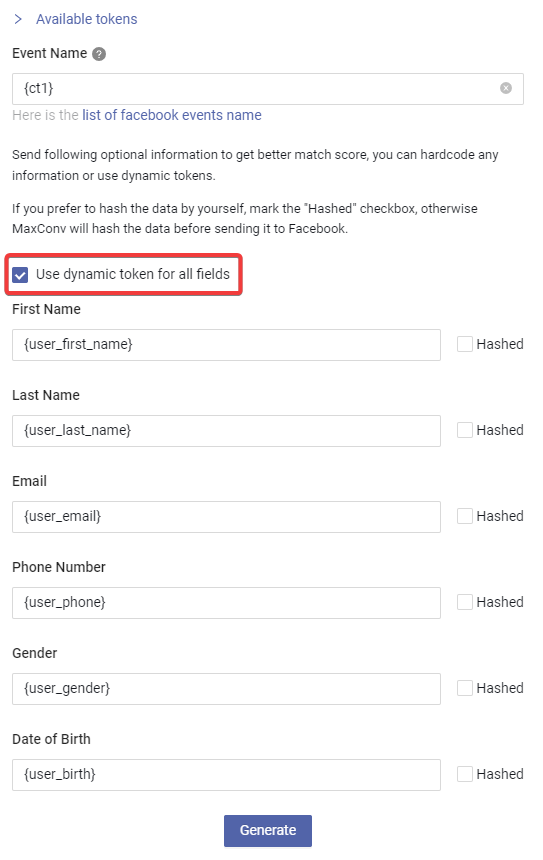
When generating postback URL, enable the Use dynamic token for all fields checkbox, all PII fields will be populated with the appropriate dynamic tokens.
tipSome PII must be hashed before sending according to Facebook requirements, MaxConv can hash them automatically, but if you want to hash them yourself, mark the Hashed checkbox.
Copy the new postback URL to traffic source.
Update your S2S postback URL with extra parameter, for example, add
&user_first_name=...to the S2S postback URL, then MaxConv will use the received data, hash it and send it to facebook.tipLearn about all supported S2S postback parameters
Part 3. Setting Up MaxConv campaign
Now you can start creating campaign in MaxConv.
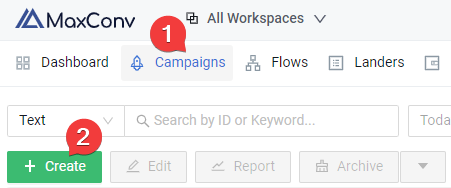
Click on the Campaigns menu in MaxConv dashboard.
Click the Create button.

Choose the traffic source you have created in the Part 2
Make sure the Transition from Ads to Campaign is set to Direct.
Type the event name into the Placeholder of
campaign token 1, if you want to send conversions with other event, type other name here.tipIf you skip providing a value for
campaign token 1, MaxConv will use the integration's default event name.
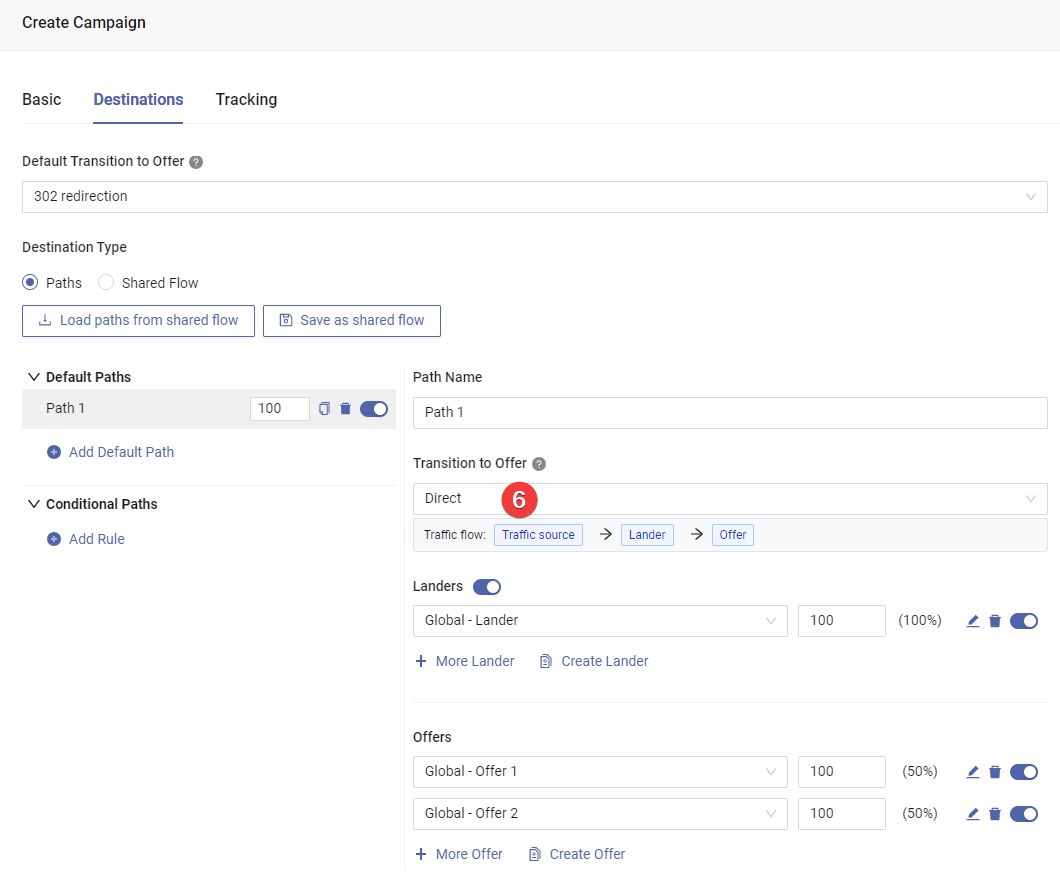
Add your landers and offers in the Destinations, set
Transition to Offerfield to DirectClick the Save button to create campaign.
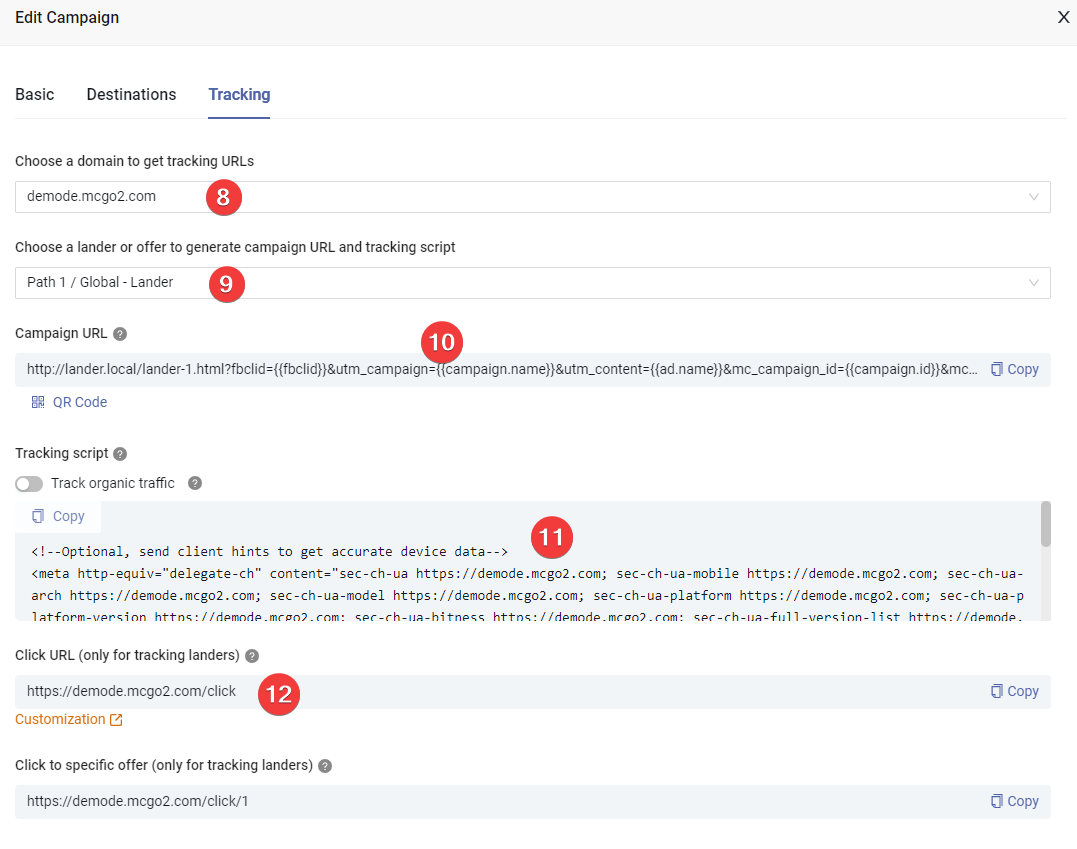
On the Tracking tab, choose your preferred tracking domain.
Choose the lander that you want to send traffic to.
Copy the campaign URL to any text editor, use this URL to set up campaign in Facebook Ads.
Copy the tracking script and paste it into the
<head>...</head>of your lander's HTML.Copy the click URL and paste it to the link of CTA button on the lander.
Part 4. Setting Up Facebook Ads campaign
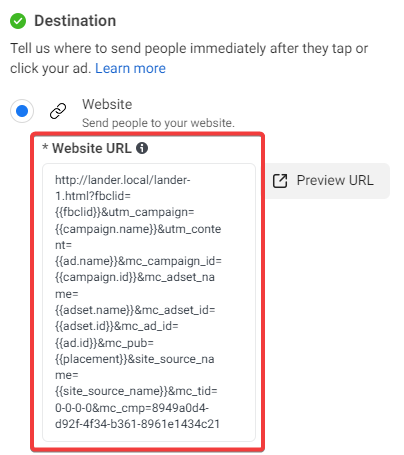
Login to your Facebook Ads account and create campaign, adjust basic settings, when creating ad, paste the Campaign URL you copied from Part 3 into the Website URL field.
Part 5. Match the MaxConv campaign with Facebook Ads campaign
To enable cost synchronization, you need to match the MaxConv campaign with a Facebook Ads campaign so that MaxConv knows where to pull cost data, to start campaign matching, perform following steps.
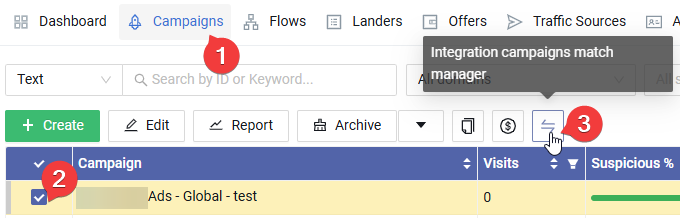
Click on the Campaigns menu in MaxConv dashboard.
Check the campaign that you want to match.
Click the Integration Campaign Match Manager button.
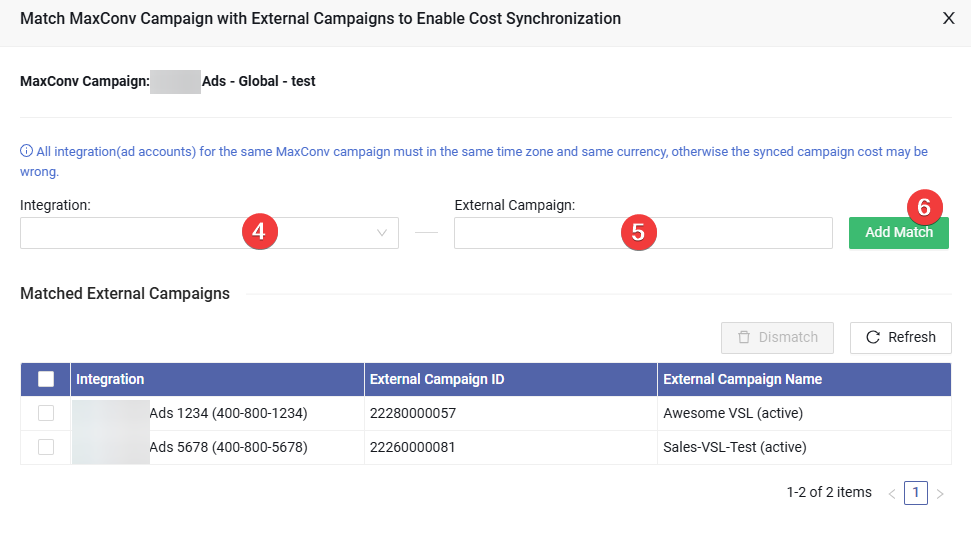
Choose the integration, MaxConv will try to pull a campaign list from that integration, wait until it loaded.
Choose all the campaigns that you want to match, you can choose multiple campaigns at a time.
Click the Add Match button to save the matching.
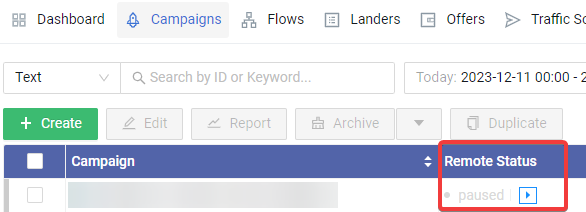
Once matched, you will see a platform icon in front of the campaign name in the Campaigns section of the MaxConv dashboard, like below:
![]()
MaxConv will begin synchronizing cost data within an hour.
Manage campaign status in MaxConv
To manage Facebook Ads campaign status within MaxConv:
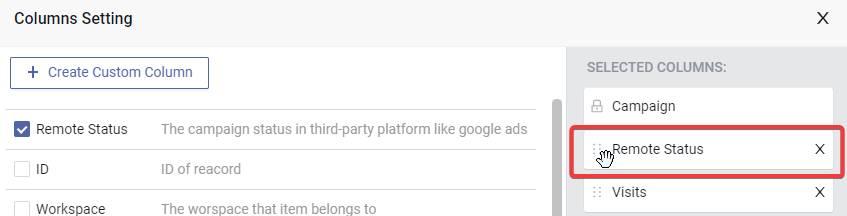
- Click the Columns setting at the top right of the table.

- Enable the Remote Status column, drag it to the top, then click the Apply button.
- You can now view the Facebook Ads campaign status, as well as start or pause it by clicking the "play" or "pause" icon.
Event Deduplication
The Meta Pixel and MaxConv integration let you share events with Meta ads so you can measure and optimize ad performance. The pixel lets you share web events from a web browser, while the MaxConv integration lets you share web events directly from server.
If you connect website activity using both the pixel and MaxConv integration, Meta ads may receive the same events from the browser and the server. Without correct setup, your events may be double reported.
To avoid double reporting, you need to send same event name and same event id both in Meta Pixel and MaxConv integration.
To send event id in Meta pixel, add eventID to the 4th argument in the fbq track call, for example:
fbq('track', 'Purchase', {value: 12, currency: 'USD'}, {eventID: 'EVENT_ID'});
To send event ID in the MaxConv integration, you need to specify the event_id when generating the integration's postback URL, like below:
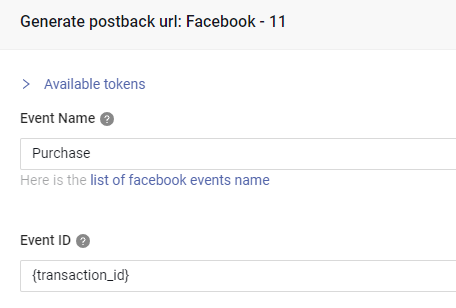
If your conversions have a transaction ID, we suggest sending the transaction ID as the event ID. Otherwise, send the click ID as the event ID.
FAQ
Have questions? Check Integration FAQ