Armor
Armor is a powerful feature that allows you to filter unwanted traffic in reports.
Every armor you create can be assigned to campaigns. A single campaign can be associated with multiple armors.
An armor consists of two parts: Conditions and Action.
When the armor's conditions are satisfied, MaxConv will take the action you specified.
Adding Armors
Click your name on the top right of MaxConv panel, click the Armor button in dropdown list.

Now we comes to the armor editor:

Choose workspace that this armor will be assigned to.
Type your armor name.
Armor tags.
Set this armor as Global Armor or not.
tipGlobal armors will protect all campaigns in your app.
The armor action to take if all conditions are satisfied.
Show 404. Show http 404 page.Show 403. Show http 403 page.Redirect to Campaign. Redirect to selected campaign.Redirect to Url. Redirect to specific URL.
The conditions of this armor. Check Rule Editor Documentation for more details.
Supported Metrics
MaxConv supports plenty of metrics. Check the list of supported metrics.
Assign Armors to Campaigns
After creating armors, if you want to apply an armor to a certain campaign, please edit the campaign settings and choose the armor in the "Armors" field.
Armors Management
Armors can be enabled or disabled. Disabled armors won't work even if they are assigned to campaigns.
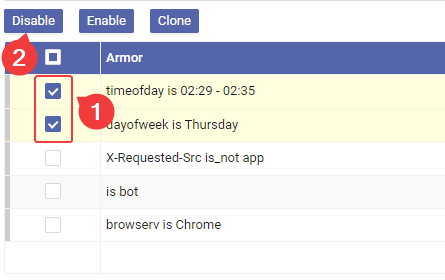
To disable some armors, follow these steps:
Choose those armors you want to disable.
Click the disable button

- Confirm action.
If you want to enable some armors, follow the same process as described above, but click enable button.